<?xml version="1.0" encoding="UTF-8"?>
<rss version="2.0"
     xmlns:content="http://purl.org/rss/1.0/modules/content/"
     xmlns:wfw="http://wellformedweb.org/CommentAPI/"
     xmlns:dc="http://purl.org/dc/elements/1.1/"
     xmlns:atom="http://www.w3.org/2005/Atom"
     xmlns:sy="http://purl.org/rss/1.0/modules/syndication/"
     xmlns:slash="http://purl.org/rss/1.0/modules/slash/">
    <channel>
        <title>玩意</title>
        <atom:link href="https://www.qzmer.me/atom.xml" rel="self" type="application/rss+xml"/>
        <link>https://www.qzmer.me</link>
        <description></description>
        <language>zh-CN</language>
        <sy:updatePeriod>hourly</sy:updatePeriod>
        <sy:updateFrequency>1</sy:updateFrequency>
        <generator>https://halo.run</generator>
    </channel>
            <item>
                <title><![CDATA[1、简单聊聊web3j参数编码，调用智能合约]]></title>
                <link>https://www.qzmer.me/archives/web3j-param-encode-and-decode</link>
                <comments>https://www.qzmer.me/archives/web3j-param-encode-and-decode#comments</comments>
                <pubDate>Dec 31, 2024 5:13:32 PM</pubDate>
                <dc:creator><![CDATA[qzmer2]]></dc:creator>

                        <category><![CDATA[web3]]></category>
                <description>
                    <![CDATA[
                        关于web3j编码和解码普通参数的处理
                    ]]>
                </description>
                <content:encoded>
                    <![CDATA[
                            <p>我假设你已经有了相关的基础,本次暂时只讲参数编码，什么时候有空了，再继续往后写，来补全完整签名上链过程。</p>
<h4 id="前置说明">前置说明</h4>
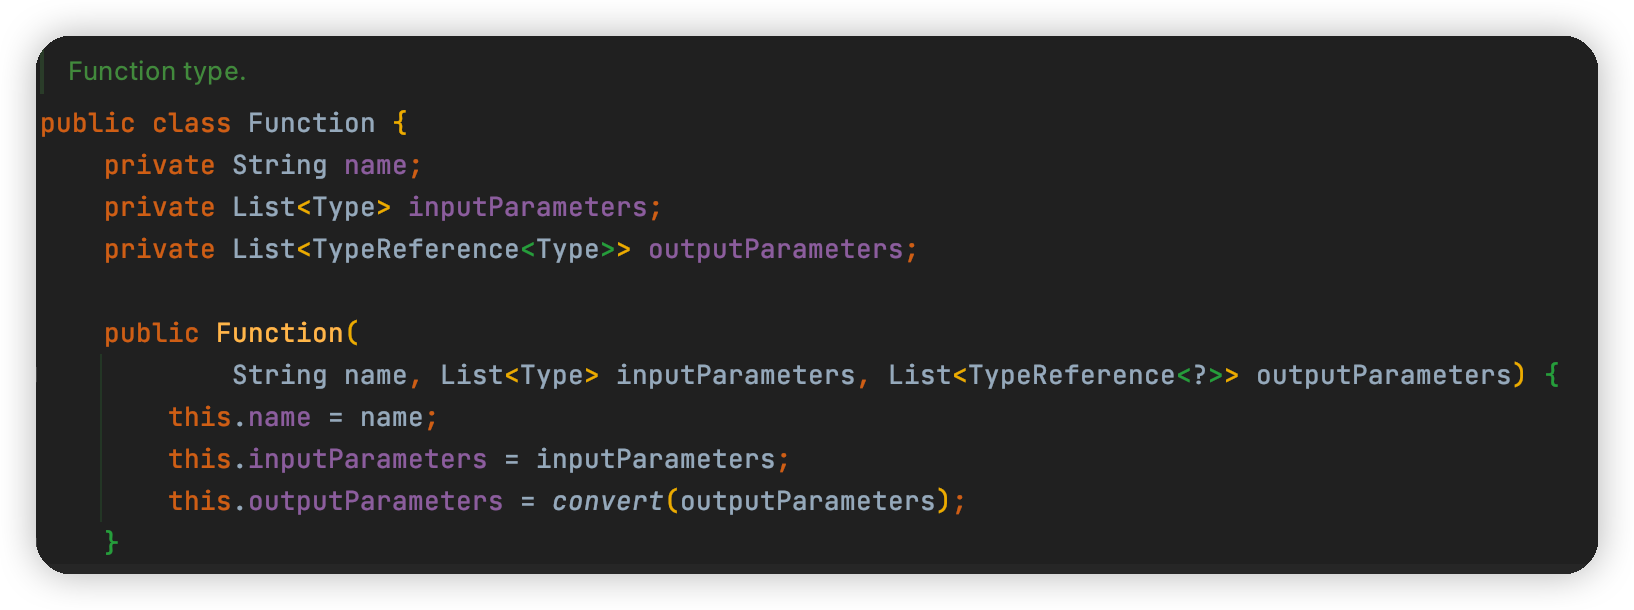
<p>参数编码，绕不过Function这个类<br />
可以看到构造函数也比较明确，3个参数，函数名，入参列表，出参列表。<br />
<img src="https://www.qzmer.me/upload/2024/7/image-d5b74d98128a43daac7637999cf2eeaa.png" alt="image.png" /></p>
<h4 id="1普通参数的编码">1、普通参数的编码</h4>
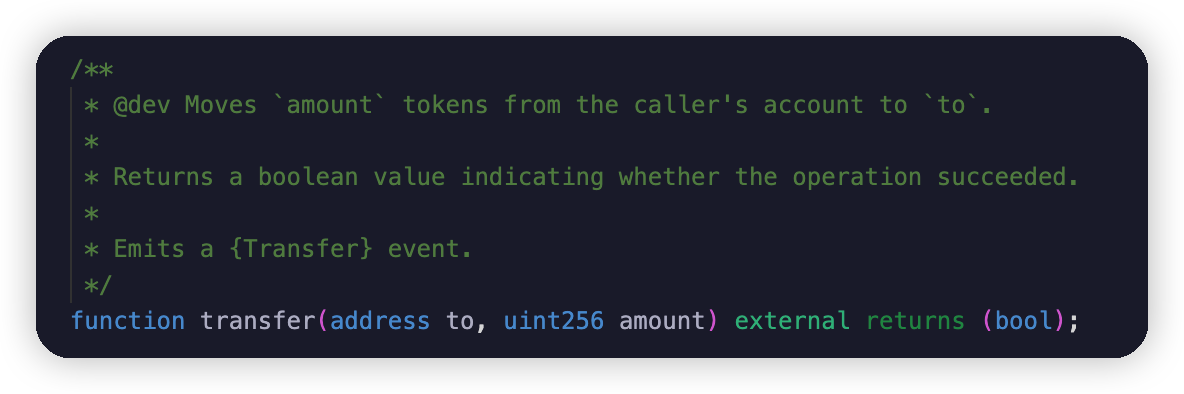
<p>例如,ERC20代币的transfer方法或transferFrom方法等。<br />
以transfer为例<br />
方法名为transfer，入参2个，address和uint256。<br />
<img src="https://www.qzmer.me/upload/2024/12/image-2b1b5cca01c44d0d83b134aa2a47fb1e.png" alt="image.png" /></p>
<p>那么这个入参就比较简单</p>
<pre><code>List&lt;Type&gt; inputs = Arrays.asList(
                    new Address(0x地址),
                    new Uint256(wei转账数量)
            );
</code></pre>
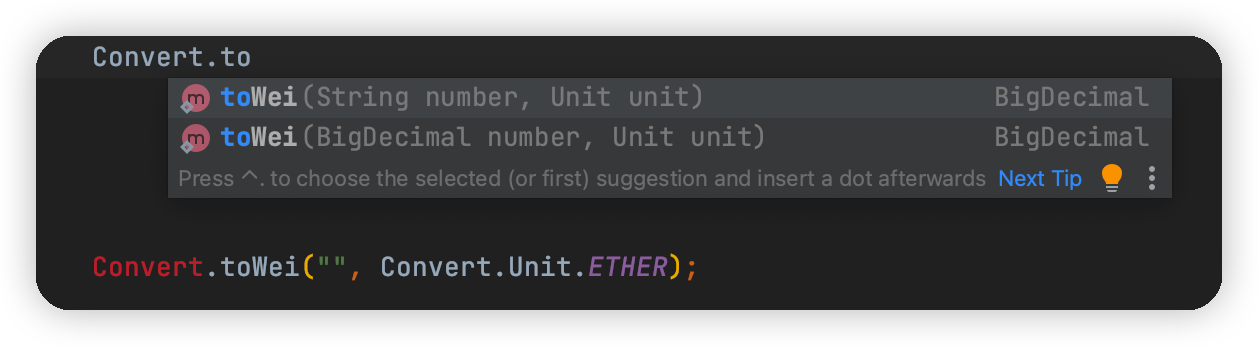
<p>// 这里有一个金额转wei数量的方法<br />
<img src="https://www.qzmer.me/upload/2024/12/image-3213366034f24ed7bb157532de40b404.png" alt="image.png" /><br />
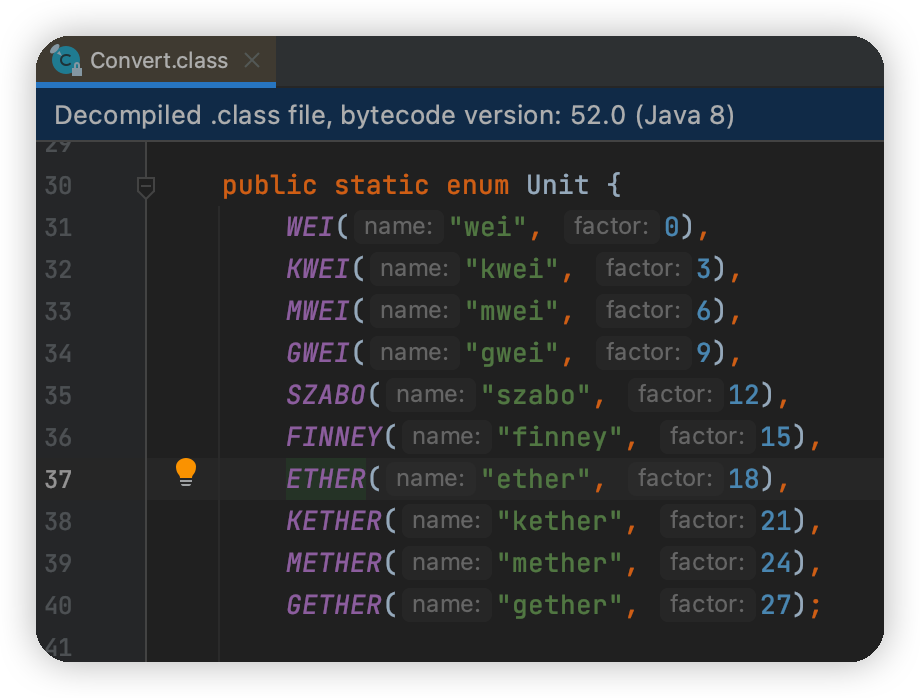
常用的精度也有常量可选用<br />
<img src="https://www.qzmer.me/upload/2024/12/image-15c5487f6220499dae99353ad209c9c5.png" alt="image.png" /></p>
<pre><code>Function function = new Function(funcName, inputs, outputs);
// 得到签名前的data字符串了
String hex = FunctionEncoder.encode(function);
</code></pre>
<p>其实得到这个东西，你就可以直接在钱包里转账，把16进制参数打开<br />
填入to地址（ERC20代币的转账，to地址是代币合约地址）<br />
然后把上面这串hex字符串填入，签名即可完成转账了</p>
<h4 id="2普通参数的解码">2、普通参数的解码</h4>
<p>以最近一笔我写文章时的链上的USDT转账为例<br />
<img src="https://www.qzmer.me/upload/2024/12/image-c3cc09dffa94426d96084df49121eebd.png" alt="image.png" /><br />
我们都知道上面的hex串中前10位，是对方法名+参数进行sha3（keccak256）哈希运算之后，取前4个字节的结果<br />
那我们想通过这个参数，如何解出参数值呢？以下为例</p>
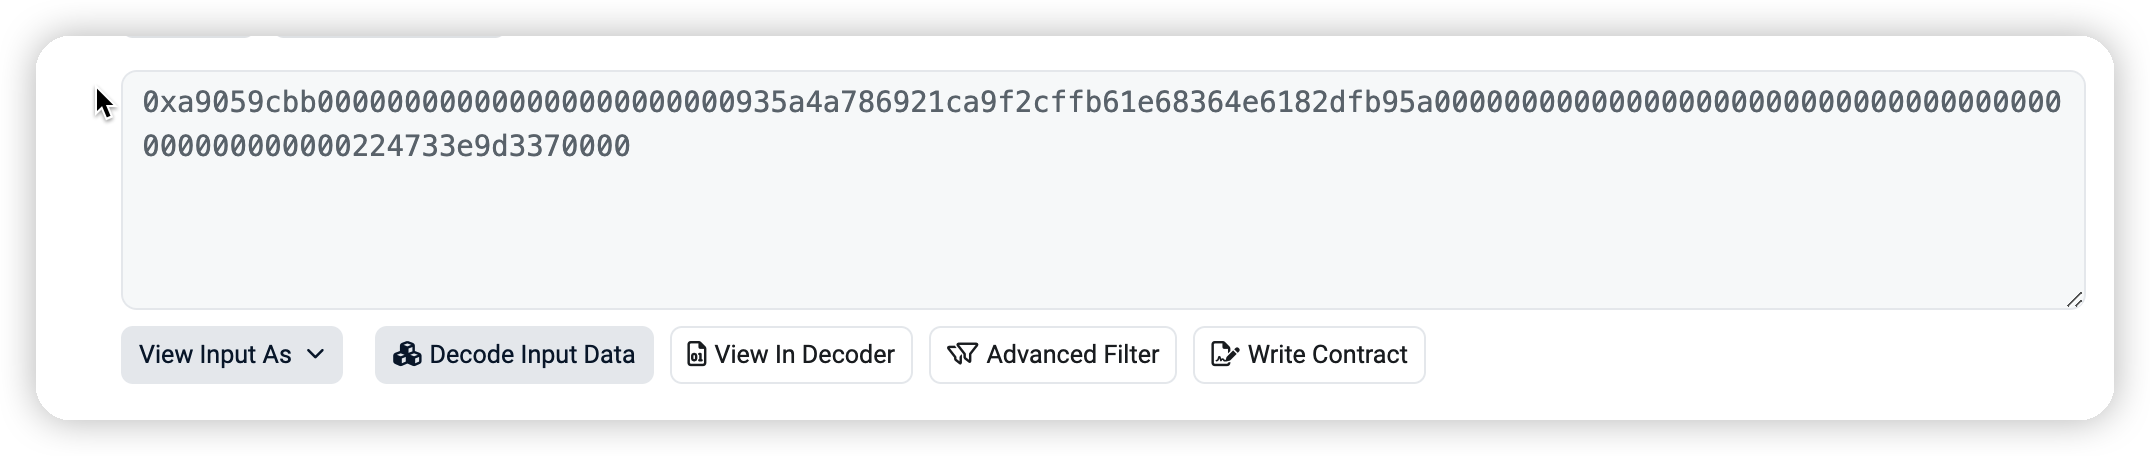
<pre><code>0xa9059cbb000000000000000000000000935a4a786921ca9f2cffb61e68364e6182dfb95a000000000000000000000000000000000000000000000000224733e9d3370000
</code></pre>
<p>我们知道有调用的合约方法的api</p>
<pre><code>Function function = new Function(funcName, inputs, outputs);
        String data = FunctionEncoder.encode(function);
……
List&lt;Type&gt; decodeList = FunctionReturnDecoder.decode(str, function.getOutputParameters());
</code></pre>
<p>通过Funcition的构造方法可以得到出参，我们是不是可以学习一下这个方法呢？<br />
自然是可以的，我们剔除掉前10位方法标识符后，剩下的参数解码即可</p>
<pre><code>List&lt;Type&gt; list = FunctionReturnDecoder.decode(hex.substring(10), Utils.convert(Arrays.asList(
                        new TypeReference&lt;Address&gt;() {},
                        new TypeReference&lt;Uint256&gt;() {}
                )));
String addr = ((Address) list.get(0)).getValue();
BigInteger weiValue = ((Uint256) list.get(1)).getValue();
</code></pre>
<p>至此，你就可以拿到转账的地址和wei金额，自行做后续处理了。<br />
当然如果做扫块，这块解码的代码一定记得try catch，因为链上有人投毒，错误的传参，并打包上链的大有人在，解码出错就说明可以忽略跳过</p>
<p>有时间再写一篇数组,集合,自定义结构体的参数编码与解码</p>

                    ]]>
                </content:encoded>
            </item>
            <item>
                <title><![CDATA[Springboot的多环境的思考]]></title>
                <link>https://www.qzmer.me/archives/springboot%E7%9A%84%E5%A4%9A%E7%8E%AF%E5%A2%83%E7%9A%84%E6%80%9D%E8%80%83</link>
                <comments>https://www.qzmer.me/archives/springboot%E7%9A%84%E5%A4%9A%E7%8E%AF%E5%A2%83%E7%9A%84%E6%80%9D%E8%80%83#comments</comments>
                <pubDate>Sep 23, 2024 3:25:10 AM</pubDate>
                <dc:creator><![CDATA[qzmer2]]></dc:creator>

                <description>
                    <![CDATA[
                        曾经写过两篇简单的关于多环境的配置方式，但是直到23年，从一个朋友的代码中获得一些灵感，促成了我想写下这过程中的一些思考一、前提以下思考也是基于我目前的状态，即大多数时候，应用的并发要求并不高，技术团队就2-3人，甚至后端有时候只有我1人，所以很多时候我基本上不使用云原生相关的技术，甚至连docke
                    ]]>
                </description>
                <content:encoded>
                    <![CDATA[
                            <p>曾经写过两篇简单的关于多环境的配置方式，但是直到23年，从一个朋友的代码中获得一些灵感，促成了我想写下这过程中的一些思考</p>
<h3 id="一前提">一、前提</h3>
<p>以下思考也是基于我目前的状态，即大多数时候，应用的并发要求并不高，技术团队就2-3人，甚至后端有时候只有我1人，所以很多时候我基本上不使用云原生相关的技术，甚至连docker也不使用。docker解决的问题，我用AMI/镜像就可以解决，根据不同的中间件需求，配几个不同的AMI即可。docker还牵涉到多次网络上传，即本地到hub，服务器从hub获取的网络传输，在复杂和不稳定的国外网络环境下，我甚至还要考虑缩小上传包的大小。<br />
再说单机和微服务的选择，在单机能完全承担流量和性能的要求时，我决不推荐优先选微服务，无论微服务的资源要求，还是分布式事务的难点（很多时候小团队甚至不解决分布式事务的问题），以及还牵涉到分布式事务的业务代码改造和引入更多复杂中间件的问题上，微服务都不是一个解决所有问题的银弹。更多时候，我会先对源码预留好方便微服务拆分的包结构，这样即使后边需要进行微服务拆分，也只需要把整个包迁移到相应微服务的项目里即可。</p>
<h3 id="二几个痛点">二、几个痛点</h3>
<h4 id="问题1-多环境需要打多次包">问题1 多环境需要打多次包</h4>
<p>你肯定大概率有碰到过自己或同事因为遗漏修改某个生产环境参数的配置，导致上线出错的问题，所以越多环境需要指明环境，越容易出错。大部分时候，大部分人，开发已经消耗了他们的大部分精力和关注力，他们不会关心一个配置的上线，也不会提醒说注意某个配置，只会在失败时提出原因和解决方案。而且在沟通成本比较大的场景下，减少错误的出现，才是个人认为比较经济的解决方案。</p>
<h4 id="问题2-交接时的配置遗漏或完全缺失">问题2 交接时的配置遗漏或完全缺失</h4>
<p>因为经常需要交接，源码中的开发和测试配置，常有与生产配置项不全或遗漏的情况。我甚至碰到过，有些人application.yml只配置了nacos的信息，交接时，他没有备份nacos的配置，导致全部配置项丢失的情况，碰到这种有时候真的很抓狂。</p>
<h4 id="问题3-">问题3 ……</h4>
<p>想到再补充</p>
<h3 id="三理想中的">三、理想中的</h3>
<h4 id="发布时最好不要每次打不同环境的包即源码包最好任何环境都可以适用">发布时最好不要每次打不同环境的包（即源码包最好任何环境都可以适用）</h4>
<p>不同环境使用同一份源码包，我可以打一个包分别上传到test,prelease,prod等不同的环境，而且同一份源码，即表示不需要在编译时区分环境，减少配置，减少构建环境的差异，减少部署时的注意项，防止关注点因为人为遗漏引起的诸多问题</p>
<h4 id="配置项最好跟着源码配置值不要跟着源码">配置项最好跟着源码，配置值不要跟着源码</h4>
<p>配置跟着代码，就不容易丢失，交接时，仍然可以知道所有的配置项，不会出现上面所说的问题2。配置值不提交到源码，是因为我们源码可能位于任何地方，公开的(github)，私有的(公司内网,自建库等)，说是私有其实属于公有的(三方免费或收费的服务)。虽然spring对于配置值加密已经有很多解决方案，但是实习生把源码发到私有博客/git的事件也实有发生，而且把加密后配置值暴露始终也是有隐患的。</p>
<h3 id="四目前的解决方案">四、目前的解决方案</h3>
<h4 id="在applicatinyml里配置全局的所有配置配置值用占位符代替">在applicatin.yml里配置全局的所有配置，配置值用占位符代替</h4>
<p>application.yml</p>
<pre><code class="language-yaml">spring:
  datasource:
    url: ${mysql.url}
    username: ${mysql.user}
    password: ${mysql.pwd}
</code></pre>
<h4 id="在不同环境的配置里配置占位符变量的值">在不同环境的配置里，配置占位符变量的值</h4>
<p>application-local.yml</p>
<pre><code class="language-yaml">mysql:
  ur: xxxx
  user: xxx
  pwd: xxx
</code></pre>
<p>这样在不同环境的配置文件里，我们就可以只关注重点的配置信息，而且可以不用按spring冗长的配置信息名，配置结构去配置。也可以免除之前的，application.yml只配公共，application-{环境}.yml里配环境变化的值，导致的同一类的配置信息分到不同文件的割裂问题了。<br />
并且这样配置，即使源码中不包含配置值，从全量的配置文件中找出所有要配置的信息，也不难。</p>
<h3 id="五不完美">五、不完美</h3>
<h4 id="对于数组集合的支持不完美">对于数组/集合的支持不完美</h4>
<p>application.yml</p>
<pre><code class="language-yaml">arrays1:
 - {a.0}
 - {a[1]}
 - {a.a2}
arrays2: {a}
</code></pre>
<p>application-local.yml</p>
<pre><code class="language-yaml">a:
 - v1
 - v2
 - v3
</code></pre>
<p>碰到原始配置是数组或集合，甚至集合/集合+对象的配置，想要通过引入的配置的方法配置值，以上的方式都是不行的（可能我没有去读源码导致没找到最终的解决方案，如果有人知道或找到了，请一定给我留言）</p>
<h3 id="六未做的尝试">六、未做的尝试</h3>
<h4 id="nacos下可否使用此配置">nacos下，可否使用此配置？</h4>
<p>例如源码中只配置全量的配置和占位符，在nacos你本地配置一样，配置不同环境的占位符关键配置项的值即可，这些推断，因为各种原因，截止发稿时还未做尝试</p>
<h4 id="微服务下是否有效如nacos">微服务下是否有效（如nacos）</h4>
<p>因为微服务下大部分应用都会有刷新环境变量配置的要求，如果上面的成立，我们刷新application-local.yml里的配置项，是否会导致application.yml里的配置不会刷新？<br />
即，如下：<br />
application.yml</p>
<pre><code class="language-yaml">spring:
  datasource:
    url: ${mysql.url}
</code></pre>
<p>application-local.yml</p>
<pre><code class="language-yaml">mysql:
  url: xxx
</code></pre>
<p>系统检测到刷新的是mysql.url，而不是spring.datasource.url，导致我们想要实现的spring.datasource.url的刷新，不能实现。</p>
<h3 id="七遗留的思考">七、遗留的思考</h3>
<p>很多微服务项目使用maven变量区分环境，因为他们默认技术团队会有CI自动化，jks流水线(pipline)等各种自动化流程，所以即使不同的环境需要打不同的包，从部署环境时一次修改，永久有效的收益上来说，问题也不大。<br />
不过个人认为以上如果有效，仍然可以让编译构建发布流程公共化和无环境化，对整个流程上又未尝不是一个正面的影响</p>

                    ]]>
                </content:encoded>
            </item>
            <item>
                <title><![CDATA[一些执念]]></title>
                <link>https://www.qzmer.me/archives/twocold</link>
                <comments>https://www.qzmer.me/archives/twocold#comments</comments>
                <pubDate>May 20, 2024 8:27:40 AM</pubDate>
                <dc:creator><![CDATA[qzmer2]]></dc:creator>

                <description>
                    <![CDATA[
                        一些执念
                    ]]>
                </description>
                <content:encoded>
                    <![CDATA[
                            <pre><code>对于韩寒博客收集的执念，就像为了弥补青春的遗憾一样，每每看到时，总会扯出几分痛感。于是在一个安静的晚上，花了一点时间，在前人的基础之上，收集了最终章。可能就像我们不经意才会想起的这片自留地，大多数人收集以后，也未必会尽览一遍，但我仍如珠玉一般的珍视，无论是被韩寒引领抑或是本就夹杂着我们所认可却又无可释放的态度，以及他下笔如有神怼人有铿锵的姿态，这些都至少有那么一部分代表了我的青春年代。
                                ---- 世纪末的魔法师
                                     2024-05-20
</code></pre>
<p>附上全集下载地址：<br />
文件包含<br />
Twocold.Blog.Backup.2005.PDF-full-LOADREAM.pdf<br />
~<br />
Twocold.Blog.Backup.2012.PDF-full-LOADREAM.pdf<br />
Twocold.Blog.Backup.2013~.PDF-full-by-Last-Magician.pdf</p>
<p>链接: <a href="https://pan.baidu.com/s/1wkSZXybxG_Hqe4dHvULREQ?pwd=cold">https://pan.baidu.com/s/1wkSZXybxG_Hqe4dHvULREQ?pwd=cold</a><br />
提取码: cold<br />
文件解压密码：twocold<br />
和谐太厉害了</p>

                    ]]>
                </content:encoded>
            </item>
            <item>
                <title><![CDATA[如何正确定制jackson的objectMapper的序列化等配置]]></title>
                <link>https://www.qzmer.me/archives/%E5%A6%82%E4%BD%95%E6%AD%A3%E7%A1%AE%E5%AE%9A%E5%88%B6jackson%E7%9A%84objectmapper%E7%9A%84%E5%BA%8F%E5%88%97%E5%8C%96%E9%85%8D%E7%BD%AE</link>
                <comments>https://www.qzmer.me/archives/%E5%A6%82%E4%BD%95%E6%AD%A3%E7%A1%AE%E5%AE%9A%E5%88%B6jackson%E7%9A%84objectmapper%E7%9A%84%E5%BA%8F%E5%88%97%E5%8C%96%E9%85%8D%E7%BD%AE#comments</comments>
                <pubDate>Jul 4, 2023 8:14:09 PM</pubDate>
                <dc:creator><![CDATA[qzmer2]]></dc:creator>

                        <category><![CDATA[springboot]]></category>
                <description>
                    <![CDATA[
                        之前有同事引入了pig-cloud。但是一些使用和配置的非常不友好，比如jackson，图1此配置是覆盖原始配置的，会导致jackson的很多默认加载项不加载，如果你明确知道原始配置做了哪些事情，你可以直接使用，但是很明显，jackson的推荐配置方式不是这样的，可以看JacksonAutoConf
                    ]]>
                </description>
                <content:encoded>
                    <![CDATA[
                            <p>之前有同事引入了pig-cloud。<br />
但是一些使用和配置的非常不友好，比如jackson，<br />
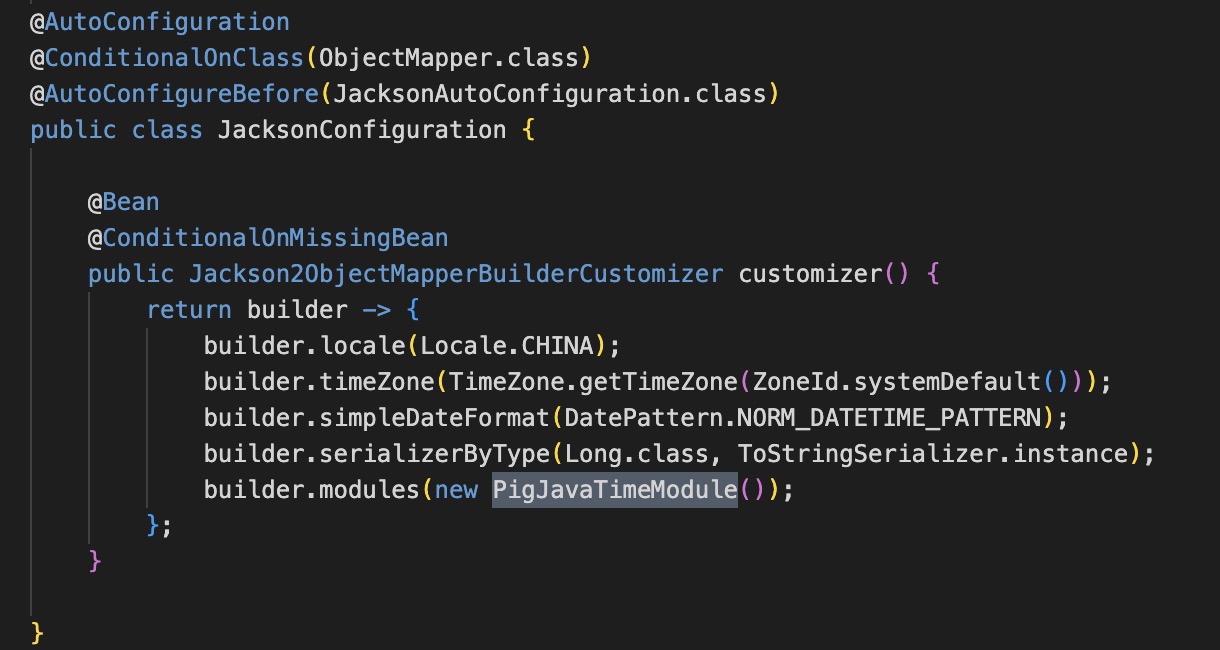
<img src="https://www.qzmer.me/upload/2023/7/2-9e3e6a3da3cb4977b7d5fe3d10b2efd9.jpg" alt="2.jpg" /><br />
图1<br />
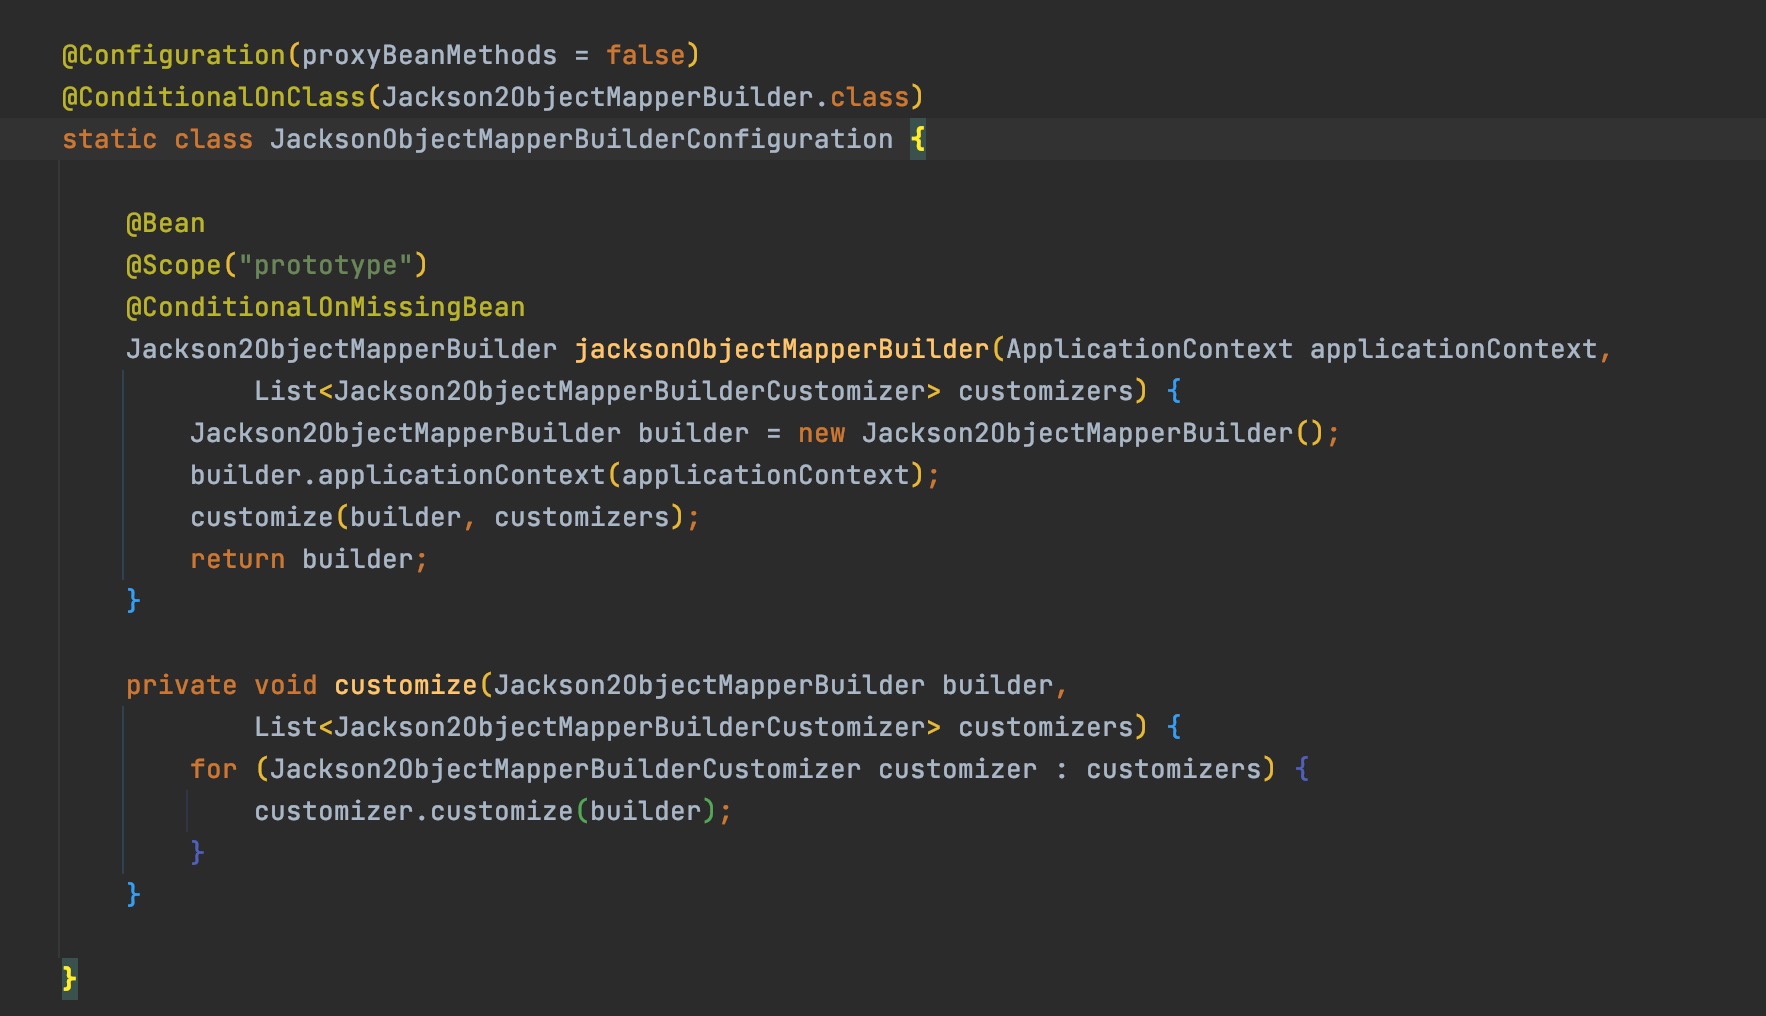
此配置是覆盖原始配置的，会导致jackson的很多默认加载项不加载，如果你明确知道原始配置做了哪些事情，你可以直接使用，但是很明显，jackson的推荐配置方式不是这样的，可以看JacksonAutoConfiguration下有个配置<br />
<img src="https://www.qzmer.me/upload/2023/8/1691753663256-a2bbe8b626644a19a5e07dae57eed324.jpg" alt="1691753663256.jpg" /></p>
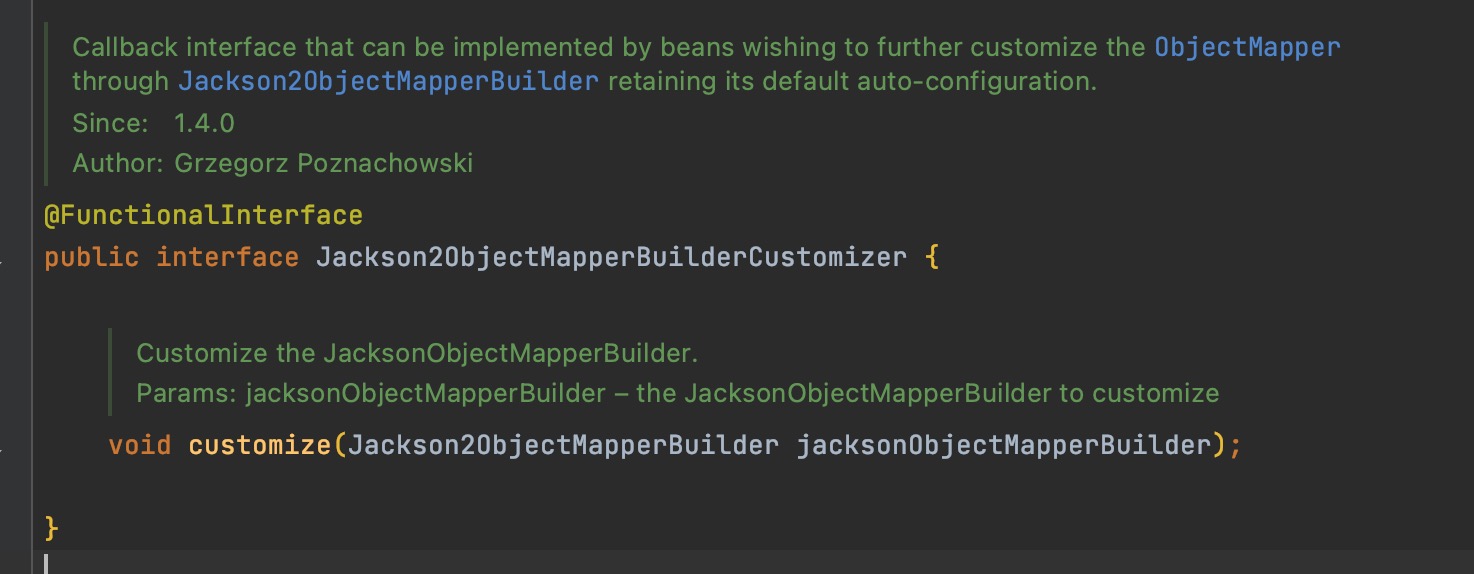
<p>该类配置目标同图1一致，但是他的依赖bean里有一个List<Jackson2ObjectMapperBuilderCustomizer> customizers。<br />
可以看到这是一个接口，那他的实现类有哪些呢<br />
<img src="https://www.qzmer.me/upload/2023/8/1691754084564-ecda1fd4e59b490e856a78fb158a6f08.jpg" alt="1691754084564.jpg" /></p>
<p>就在他的下方<br />
<img src="https://www.qzmer.me/upload/2023/8/1691754669827-5f5670492ffd439fba3e7b1216295740.jpg" alt="1691754669827.jpg" /></p>
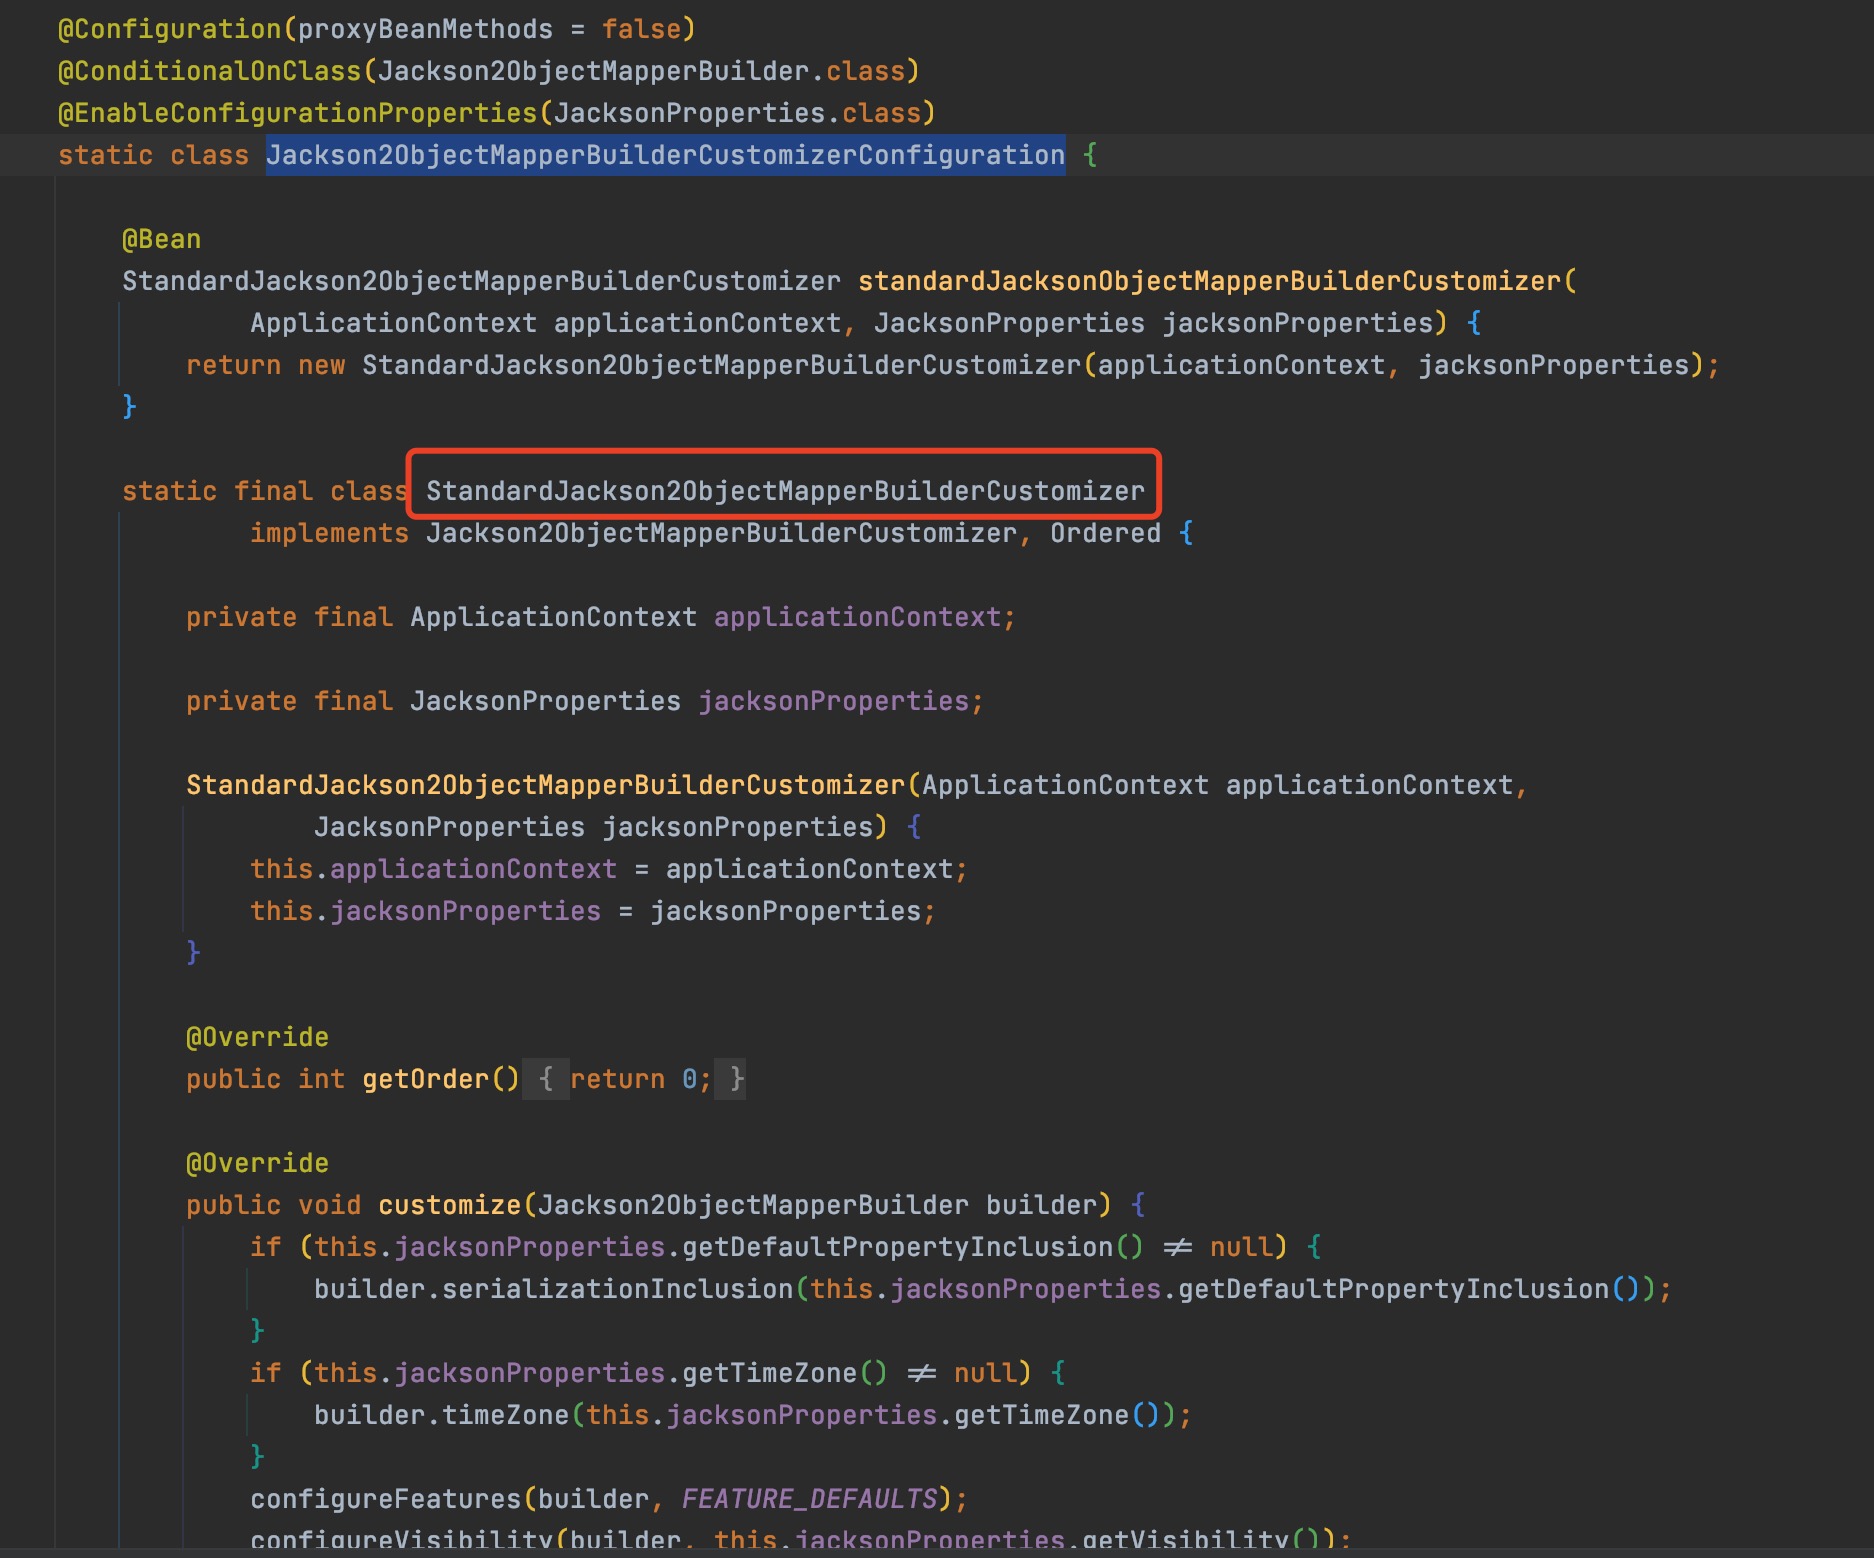
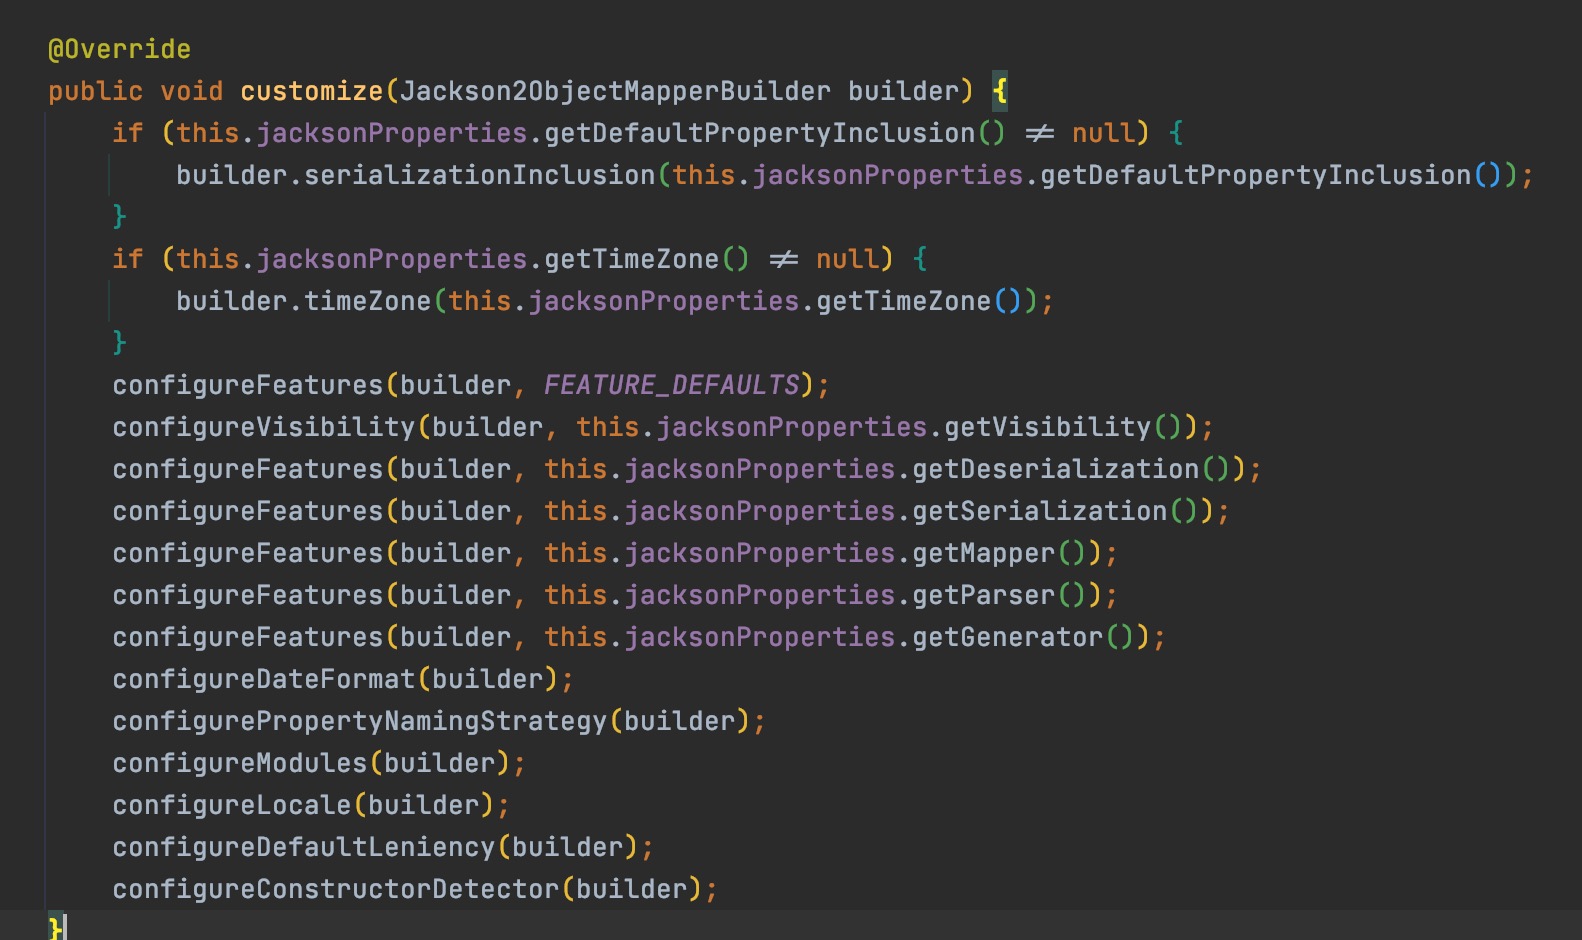
<p>这个配置里做了很多事情 ，包括对名为spring.jackson.*下的配置的加载，如果你使用图1的形式覆盖，就会导致这些配置失效。<br />
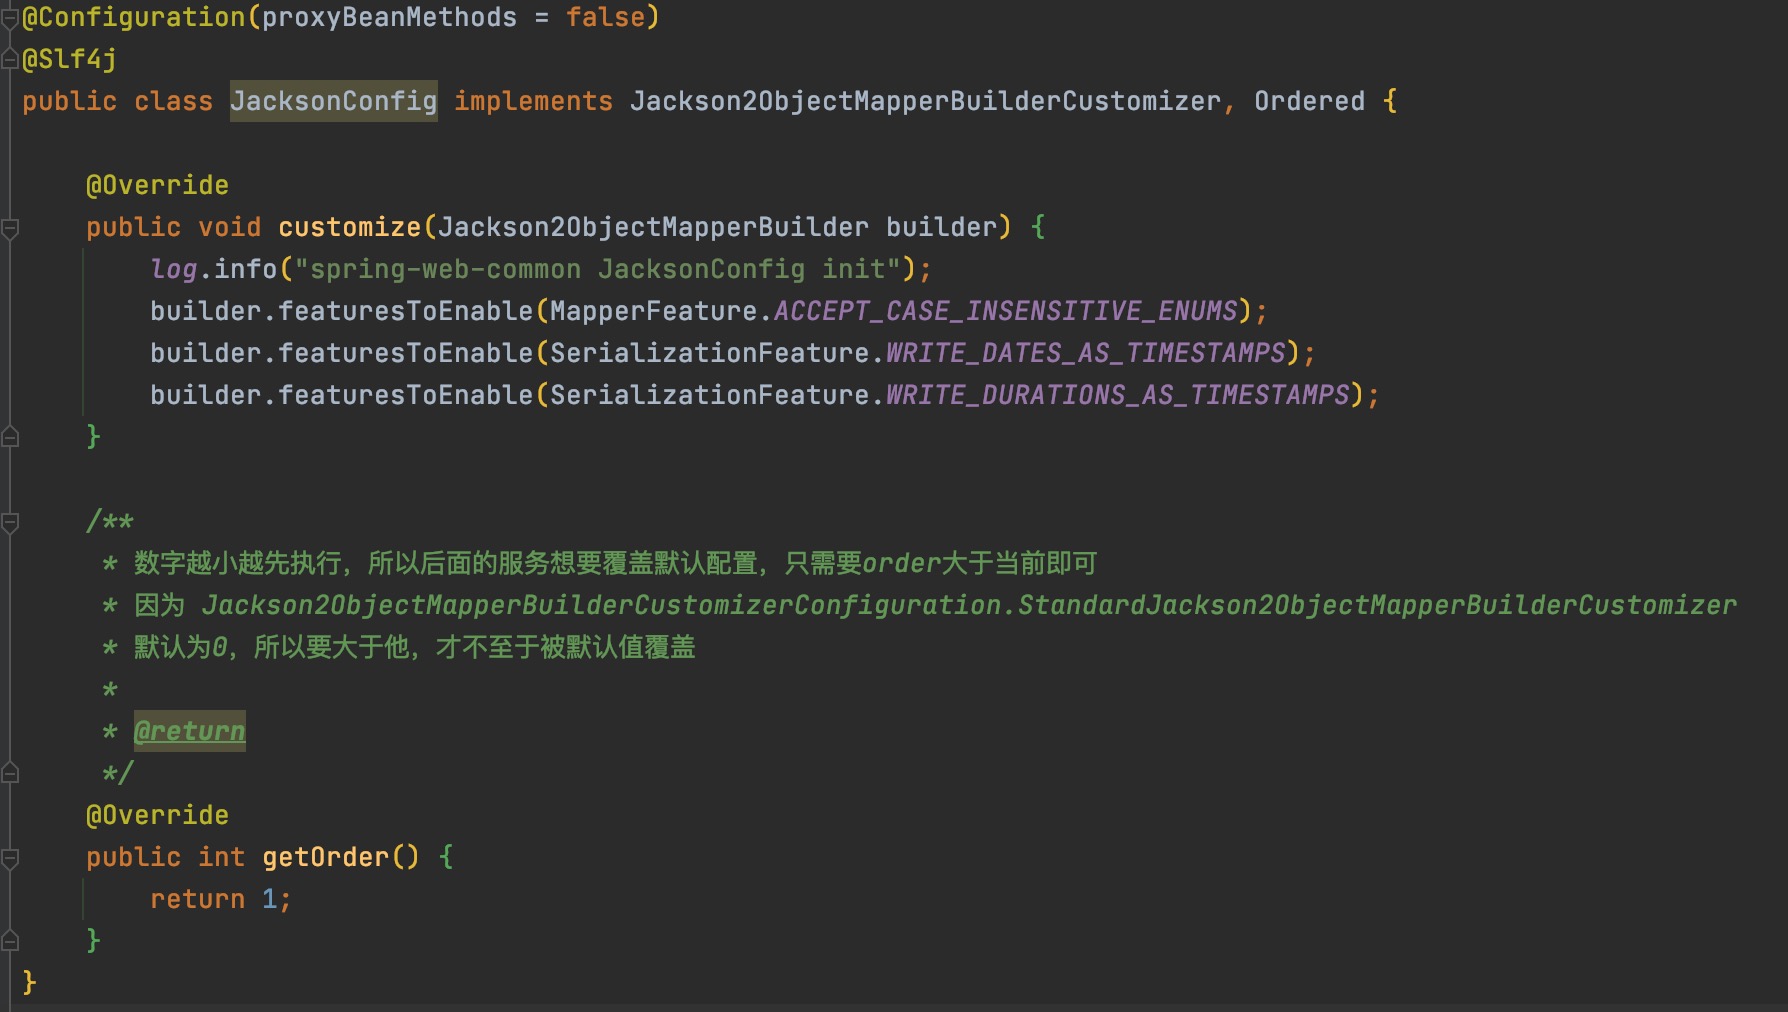
那么应该如何配呢？很显然，跟标准实现做同样的事就行了<br />
<img src="https://www.qzmer.me/upload/2023/8/1691754818461-1ceba9670fa24e9db0b2c93c476f97e4.jpg" alt="1691754818461.jpg" /></p>
<p>配置的加载是按ordered排序，从小到大，所以源码中的标准实现的ordered是0，只需要你的配置大于0，即可覆盖默认的配置。</p>
<p>再来说一下常见的加载，在标准实现里可以看到n多的默认模块加载。<br />
<img src="https://www.qzmer.me/upload/2023/8/1691755219906-b59a4a42c8d844788315b44147e8488b.jpg" alt="1691755219906.jpg" /></p>
<p>我们常用的比如JavaTimeModule。<br />
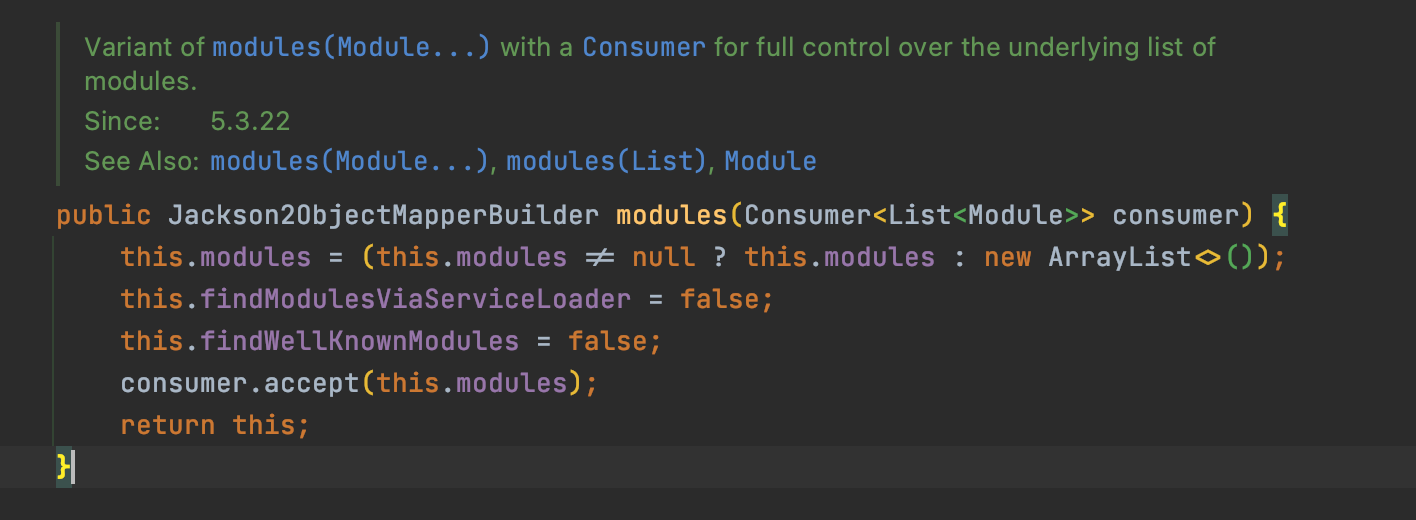
最常见的方式就是像图1中的配置，通过builder去设置，但是看源码就知道，这是一种覆盖式的设置，相当于你加了一个就只有这一个配置了，<br />
<img src="https://www.qzmer.me/upload/2023/8/image-79fffc6974fd4b4baa0ef222f72cd8b7.png" alt="image.png" /></p>
<p>但是很显然，spring更推荐通过bean注入的方式添加，在没有任何配置时，spring默认有如下module，即使我们不熟悉，也可以知道，spring是通过收集同类型的bean去注册的，所以只需要照本宣科就行<br />
<img src="https://www.qzmer.me/upload/2023/8/image-8ecd44941a6b47d2ad6a6e8cf23e6ed1.png" alt="image.png" /></p>
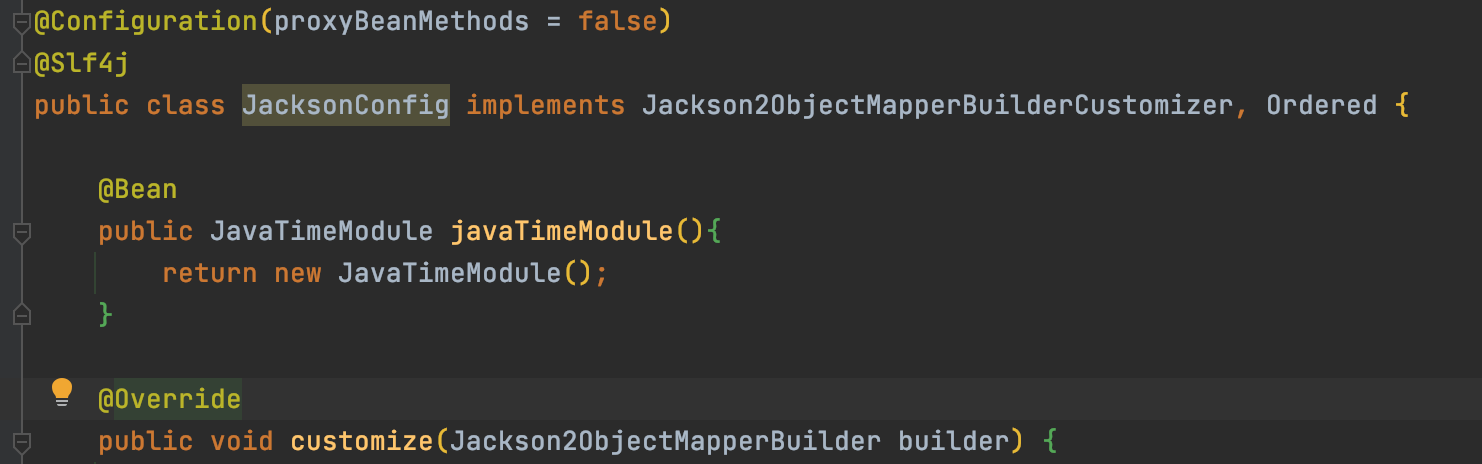
<p>只需要增加一个配置<br />
<img src="https://www.qzmer.me/upload/2023/8/image-99def164627840a7beb01a98aa06cdcc.png" alt="image.png" /></p>
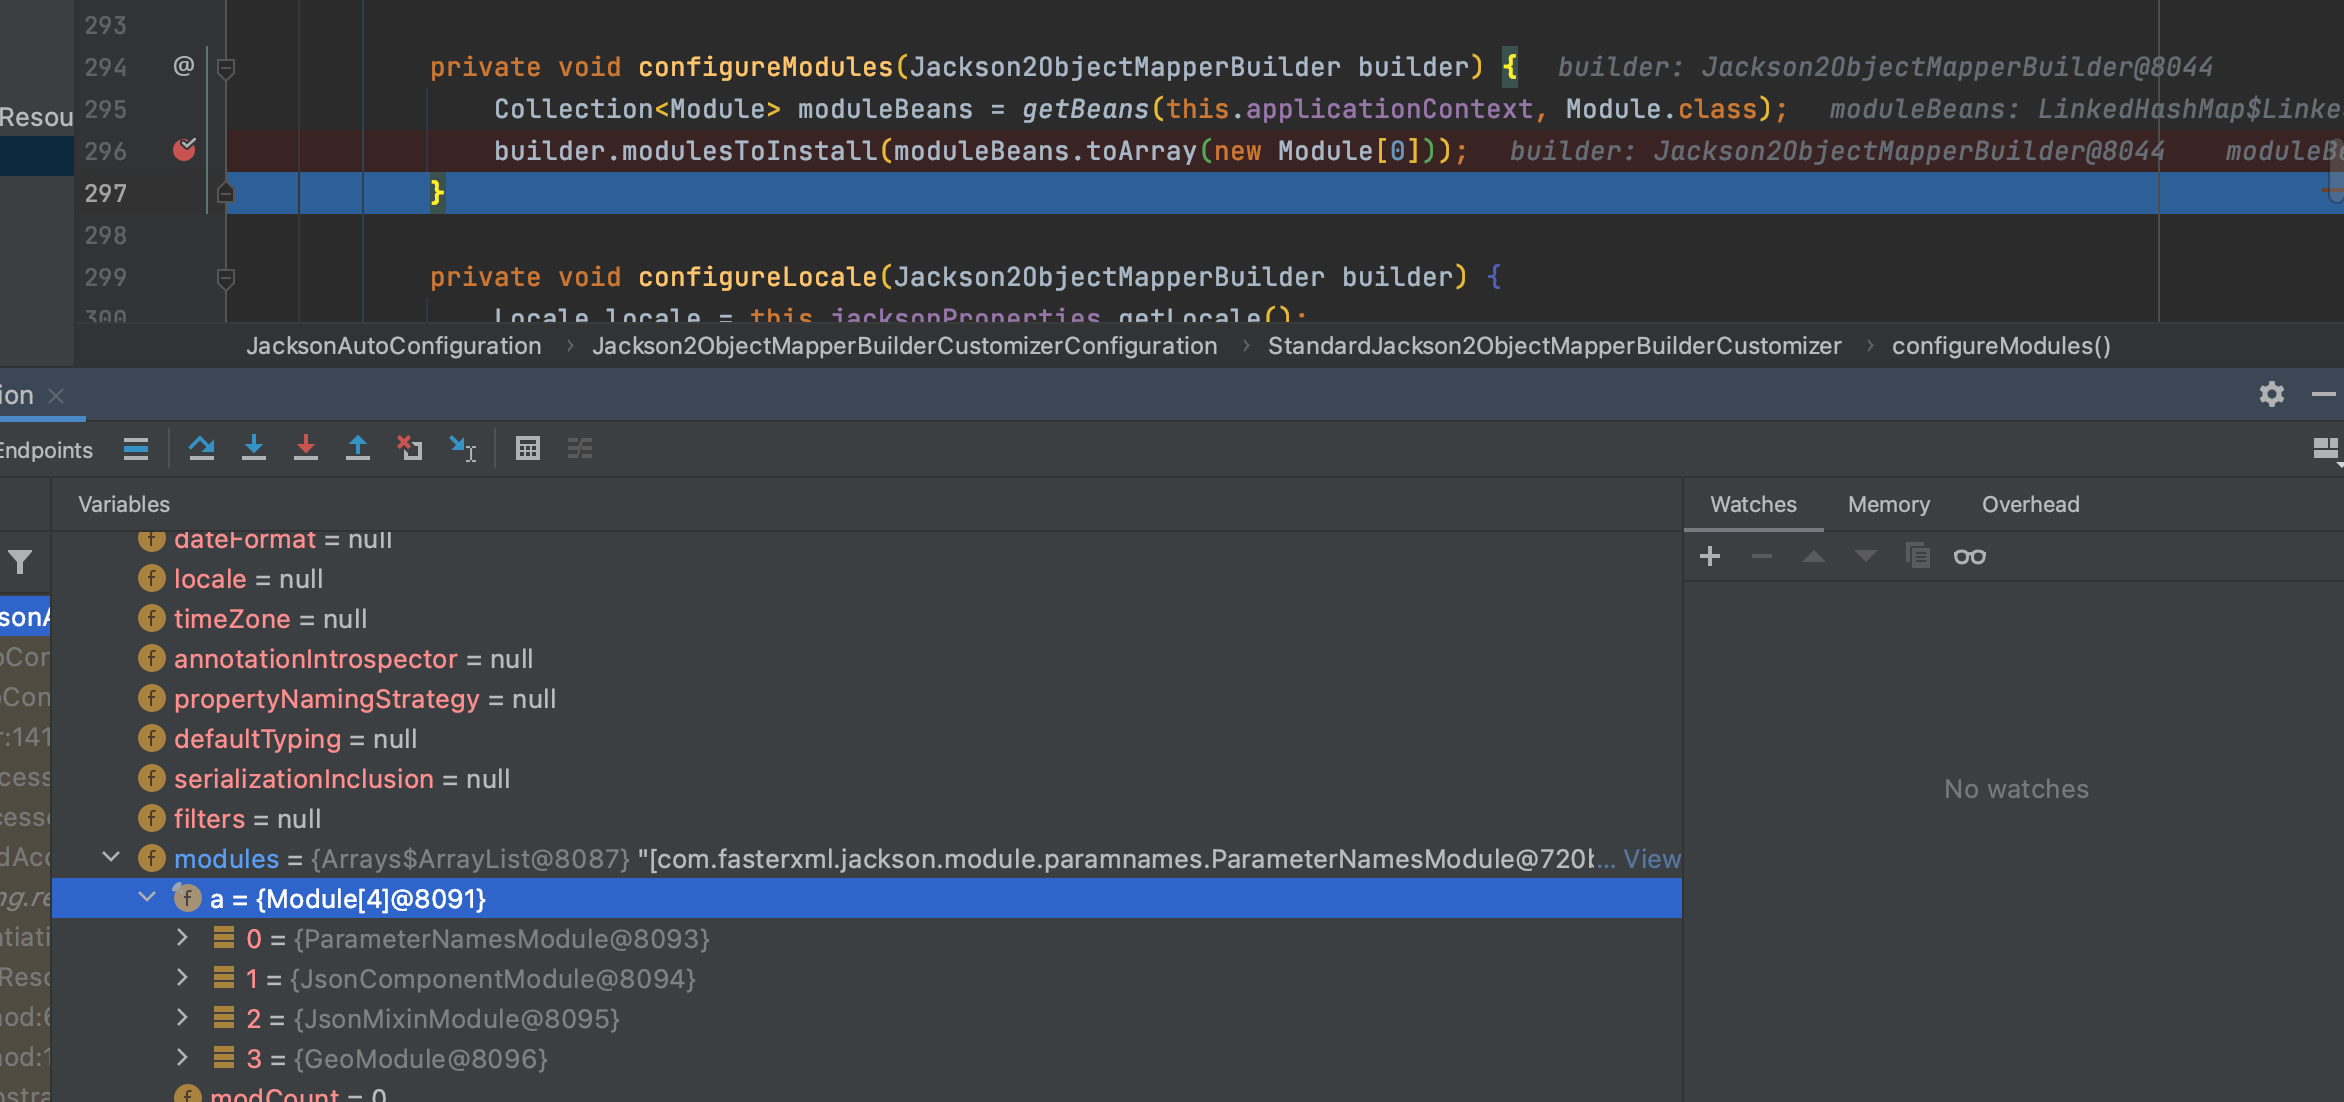
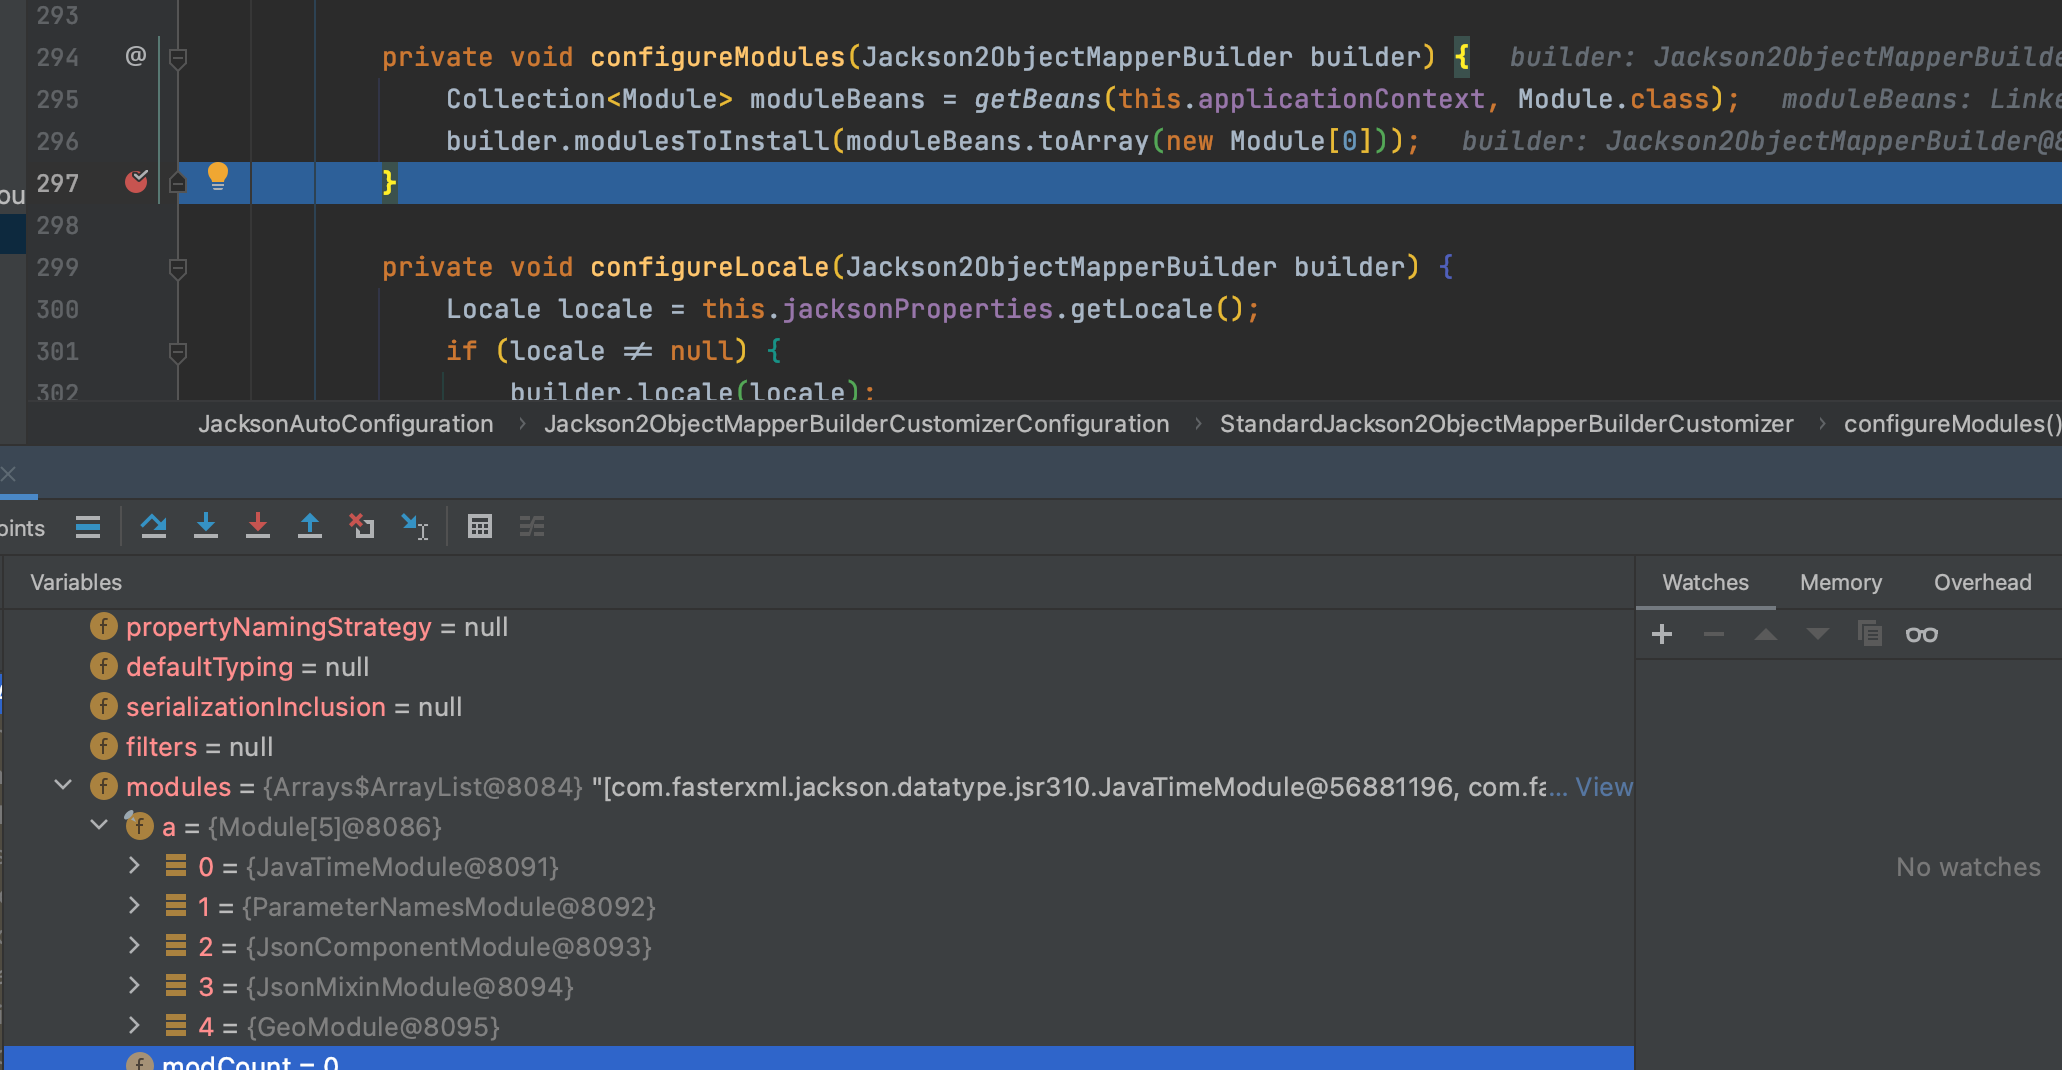
<p>就可以在启动时看到，他被加载并注册到jackson的module了<br />
<img src="https://www.qzmer.me/upload/2023/8/image-df883af3ba964bf484a6a29406713220.png" alt="image.png" /></p>
<p>所以实现Jackson2ObjectMapperBuilderCustomizer, Ordered的方式配置Jackson的各种配置，不仅方便于多模块项目，common模块写公共部分省配置，又可以通过设置高于公共模块的ordered来实现对公共模块的覆盖与自定义，非常优雅有木有！</p>
<p>所以下次别再写图1这样的配置了</p>

                    ]]>
                </content:encoded>
            </item>
            <item>
                <title><![CDATA[【转】把一个inputStream转成string的方法]]></title>
                <link>https://www.qzmer.me/archives/%E8%BD%AC%E6%8A%8A%E4%B8%80%E4%B8%AAinputstream%E8%BD%AC%E6%88%90string%E7%9A%84%E6%96%B9%E6%B3%95</link>
                <comments>https://www.qzmer.me/archives/%E8%BD%AC%E6%8A%8A%E4%B8%80%E4%B8%AAinputstream%E8%BD%AC%E6%88%90string%E7%9A%84%E6%96%B9%E6%B3%95#comments</comments>
                <pubDate>Jun 6, 2023 12:11:45 PM</pubDate>
                <dc:creator><![CDATA[qzmer2]]></dc:creator>

                <description>
                    <![CDATA[
                        源文：InputStream 转String的方法
                    ]]>
                </description>
                <content:encoded>
                    <![CDATA[
                            <p>源文：<a href="https://stackoverflow.com/questions/309424/how-do-i-read-convert-an-inputstream-into-a-string-in-java">https://stackoverflow.com/questions/309424/how-do-i-read-convert-an-inputstream-into-a-string-in-java</a></p>
<h3 id="ways-to-convert-an-inputstream-to-a-string">Ways to convert an InputStream to a String:</h3>
<h4 id="1using-ioutilstostring-apache-utils">1、Using IOUtils.toString (Apache Utils)</h4>
<pre><code> String result = IOUtils.toString(inputStream, StandardCharsets.UTF_8);
</code></pre>
<h4 id="2using-charstreams-guava">2、Using CharStreams (Guava)</h4>
<pre><code> String result = CharStreams.toString(new InputStreamReader(
       inputStream, Charsets.UTF_8));
</code></pre>
<h4 id="3using-scanner-jdk">3、Using Scanner (JDK)</h4>
<pre><code> Scanner s = new Scanner(inputStream).useDelimiter(&quot;\\A&quot;);
 String result = s.hasNext() ? s.next() : &quot;&quot;;
</code></pre>
<h4 id="4using-stream-api-java-8-warning-this-solution-converts-different-line-breaks-like-rn-to-n">4、Using Stream API (Java 8). Warning: This solution converts different line breaks (like \r\n) to \n.</h4>
<pre><code> String result = new BufferedReader(new InputStreamReader(inputStream))
   .lines().collect(Collectors.joining(&quot;\n&quot;));
</code></pre>
<h4 id="5using-parallel-stream-api-java-8-warning-this-solution-converts-different-line-breaks-like-rn-to-n">5、Using parallel Stream API (Java 8). Warning: This solution converts different line breaks (like \r\n) to \n.</h4>
<pre><code> String result = new BufferedReader(new InputStreamReader(inputStream))
    .lines().parallel().collect(Collectors.joining(&quot;\n&quot;));
</code></pre>
<h4 id="6using-inputstreamreader-and-stringbuilder-jdk">6、Using InputStreamReader and StringBuilder (JDK)</h4>
<pre><code> int bufferSize = 1024;
 char[] buffer = new char[bufferSize];
 StringBuilder out = new StringBuilder();
 Reader in = new InputStreamReader(stream, StandardCharsets.UTF_8);
 for (int numRead; (numRead = in.read(buffer, 0, buffer.length)) &gt; 0; ) {
     out.append(buffer, 0, numRead);
 }
 return out.toString();
</code></pre>
<h4 id="7using-stringwriter-and-ioutilscopy-apache-commons">7、Using StringWriter and IOUtils.copy (Apache Commons)</h4>
<pre><code> StringWriter writer = new StringWriter();
 IOUtils.copy(inputStream, writer, &quot;UTF-8&quot;);
 return writer.toString();
</code></pre>
<h4 id="8using-bytearrayoutputstream-and-inputstreamread-jdk">8、Using ByteArrayOutputStream and inputStream.read (JDK)</h4>
<pre><code> ByteArrayOutputStream result = new ByteArrayOutputStream();
 byte[] buffer = new byte[1024];
 for (int length; (length = inputStream.read(buffer)) != -1; ) {
     result.write(buffer, 0, length);
 }
 // StandardCharsets.UTF_8.name() &gt; JDK 7
 return result.toString(&quot;UTF-8&quot;);
</code></pre>
<h4 id="9using-bufferedreader-jdk-warning-this-solution-converts-different-line-breaks-like-nr-to-lineseparator-system-property-for-example-in-windows-to-rn">9、Using BufferedReader (JDK). Warning: This solution converts different line breaks (like \n\r) to line.separator system property (for example, in Windows to &quot;\r\n&quot;).</h4>
<pre><code> String newLine = System.getProperty(&quot;line.separator&quot;);
 BufferedReader reader = new BufferedReader(
         new InputStreamReader(inputStream));
 StringBuilder result = new StringBuilder();
 for (String line; (line = reader.readLine()) != null; ) {
     if (result.length() &gt; 0) {
         result.append(newLine);
     }
     result.append(line);
 }
 return result.toString();
</code></pre>
<h4 id="10using-bufferedinputstream-and-bytearrayoutputstream-jdk">10、Using BufferedInputStream and ByteArrayOutputStream (JDK)</h4>
<pre><code>BufferedInputStream bis = new BufferedInputStream(inputStream);
ByteArrayOutputStream buf = new ByteArrayOutputStream();
for (int result = bis.read(); result != -1; result = bis.read()) {
    buf.write((byte) result);
}
// StandardCharsets.UTF_8.name() &gt; JDK 7
return buf.toString(&quot;UTF-8&quot;);
</code></pre>
<h4 id="11using-inputstreamread-and-stringbuilder-jdk-warning-this-solution-has-problems-with-unicode-for-example-with-russian-text-works-correctly-only-with-non-unicode-text">11、Using inputStream.read() and StringBuilder (JDK). Warning: This solution has problems with Unicode, for example with Russian text (works correctly only with non-Unicode text)</h4>
<pre><code>StringBuilder sb = new StringBuilder();
for (int ch; (ch = inputStream.read()) != -1; ) {
    sb.append((char) ch);
}
return sb.toString();
</code></pre>
<h3 id="warning">Warning:</h3>
<h4 id="1solutions-4-5-and-9-convert-different-line-breaks-to-one">1、Solutions 4, 5 and 9 convert different line breaks to one.</h4>
<h4 id="2solution-11-cant-work-correctly-with-unicode-text">2、Solution 11 can't work correctly with Unicode text</h4>
<h3 id="performance-tests">Performance tests</h3>
<h4 id="performance-tests-for-small-string-length--175-url-in-github-mode--average-time-system--linux-score-1343-is-the-best">Performance tests for small String (length = 175), url in github (mode = Average Time, system = Linux, score 1,343 is the best):</h4>
<pre><code>              Benchmark                         Mode  Cnt   Score   Error  Units
 8. ByteArrayOutputStream and read (JDK)        avgt   10   1,343 ± 0,028  us/op
 6. InputStreamReader and StringBuilder (JDK)   avgt   10   6,980 ± 0,404  us/op
10. BufferedInputStream, ByteArrayOutputStream  avgt   10   7,437 ± 0,735  us/op
11. InputStream.read() and StringBuilder (JDK)  avgt   10   8,977 ± 0,328  us/op
 7. StringWriter and IOUtils.copy (Apache)      avgt   10  10,613 ± 0,599  us/op
 1. IOUtils.toString (Apache Utils)             avgt   10  10,605 ± 0,527  us/op
 3. Scanner (JDK)                               avgt   10  12,083 ± 0,293  us/op
 2. CharStreams (guava)                         avgt   10  12,999 ± 0,514  us/op
 4. Stream Api (Java 8)                         avgt   10  15,811 ± 0,605  us/op
 9. BufferedReader (JDK)                        avgt   10  16,038 ± 0,711  us/op
 5. parallel Stream Api (Java 8)                avgt   10  21,544 ± 0,583  us/op
</code></pre>
<h4 id="performance-tests-for-big-string-length--50100-url-in-github-mode--average-time-system--linux-score-200715-is-the-best">Performance tests for big String (length = 50100), url in github (mode = Average Time, system = Linux, score 200,715 is the best):</h4>
<pre><code>               Benchmark                        Mode  Cnt   Score        Error  Units
 8. ByteArrayOutputStream and read (JDK)        avgt   10   200,715 ±   18,103  us/op
 1. IOUtils.toString (Apache Utils)             avgt   10   300,019 ±    8,751  us/op
 6. InputStreamReader and StringBuilder (JDK)   avgt   10   347,616 ±  130,348  us/op
 7. StringWriter and IOUtils.copy (Apache)      avgt   10   352,791 ±  105,337  us/op
 2. CharStreams (guava)                         avgt   10   420,137 ±   59,877  us/op
 9. BufferedReader (JDK)                        avgt   10   632,028 ±   17,002  us/op
 5. parallel Stream Api (Java 8)                avgt   10   662,999 ±   46,199  us/op
 4. Stream Api (Java 8)                         avgt   10   701,269 ±   82,296  us/op
10. BufferedInputStream, ByteArrayOutputStream  avgt   10   740,837 ±    5,613  us/op
 3. Scanner (JDK)                               avgt   10   751,417 ±   62,026  us/op
11. InputStream.read() and StringBuilder (JDK)  avgt   10  2919,350 ± 1101,942  us/op
</code></pre>
<h4 id="graphs-performance-tests-depending-on-input-stream-length-in-windows-7-system">Graphs (performance tests depending on Input Stream length in Windows 7 system)</h4>
<p>enter image description here</p>
<h4 id="performance-test-average-time-depending-on-input-stream-length-in-windows-7-system">Performance test (Average Time) depending on Input Stream length in Windows 7 system:</h4>
<pre><code> length  182    546     1092    3276    9828    29484   58968

 test8  0.38    0.938   1.868   4.448   13.412  36.459  72.708
 test4  2.362   3.609   5.573   12.769  40.74   81.415  159.864
 test5  3.881   5.075   6.904   14.123  50.258  129.937 166.162
 test9  2.237   3.493   5.422   11.977  45.98   89.336  177.39
 test6  1.261   2.12    4.38    10.698  31.821  86.106  186.636
 test7  1.601   2.391   3.646   8.367   38.196  110.221 211.016
 test1  1.529   2.381   3.527   8.411   40.551  105.16  212.573
 test3  3.035   3.934   8.606   20.858  61.571  118.744 235.428
 test2  3.136   6.238   10.508  33.48   43.532  118.044 239.481
 test10 1.593   4.736   7.527   20.557  59.856  162.907 323.147
 test11 3.913   11.506  23.26   68.644  207.591 600.444 1211.545
</code></pre>

                    ]]>
                </content:encoded>
            </item>
            <item>
                <title><![CDATA[centos 8 部署eth节点]]></title>
                <link>https://www.qzmer.me/archives/centos8%E9%83%A8%E7%BD%B2eth%E8%8A%82%E7%82%B9</link>
                <comments>https://www.qzmer.me/archives/centos8%E9%83%A8%E7%BD%B2eth%E8%8A%82%E7%82%B9#comments</comments>
                <pubDate>Sep 16, 2022 2:20:15 PM</pubDate>
                <dc:creator><![CDATA[qzmer2]]></dc:creator>

                <description>
                    <![CDATA[
                        为了省钱，用了aws的m6g，真是没谁了，因为安全问题，不敢用第三方的镜像，centos7又不支持m6g，于是只能硬着头皮用cento8arm版本。准备工作服务器准备比如禁用SELINUX，开启文件数量限制这种基本操作#当前有效setenforce0#重启也有效sed-i&quot;s/SELINU
                    ]]>
                </description>
                <content:encoded>
                    <![CDATA[
                            <p>为了省钱，用了aws的m6g，真是没谁了，因为安全问题，不敢用第三方的镜像，centos7又不支持m6g，于是只能硬着头皮用cento 8 arm版本。</p>
<h3 id="准备工作">准备工作</h3>
<h4 id="服务器准备">服务器准备</h4>
<p>比如禁用SELINUX，开启文件数量限制这种基本操作</p>
<pre><code>#当前有效
setenforce 0
#重启也有效
sed -i &quot;s/SELINUX=enforcing/SELINUX=disabled/g&quot; /etc/selinux/config

ulimit -SHn 102400
cat &gt;&gt; /etc/security/limits.conf &lt;&lt; EOF
*           soft   nofile       102400
*           hard   nofile       102400
*           soft   nproc        102400
*           hard   nproc        102400
EOF
</code></pre>
<h3 id="服务器环境">服务器环境</h3>
<p>yum搞好<br />
一些工具包如telnet，wget，git等，可以提前安装</p>
<p>因为centos8不再维护的原因。repo进行了迁移，这样干</p>
<pre><code>sudo sed -i -e &quot;s|mirrorlist=|#mirrorlist=|g&quot; /etc/yum.repos.d/CentOS-*
sudo sed -i -e &quot;s|#baseurl=http://mirror.centos.org|baseurl=http://vault.centos.org|g&quot; /etc/yum.repos.d/CentOS-*
</code></pre>
<h3 id="安装golang">安装golang</h3>
<p>我使用yum安装最新版go是1.16。使用1.16安装go-ethereum，make时各种出错，最终还是使用手动安装最新版本解决</p>
<h4 id="1下载文件">1、下载文件</h4>
<p>国内下载 <a href="https://golang.google.cn/dl/">https://golang.google.cn/dl/</a></p>
<pre><code>wget https://golang.google.cn/dl/go1.19.1.linux-arm64.tar.gz
</code></pre>
<h4 id="2解压文件到-usrlocal">2、解压文件到 /usr/local</h4>
<p>【重要】如果之前已经安装过go的版本，先清空下go下面src，不然可能会报一些previous declaration at /usr/local/go/src/runtime/internal/atomic/atomic_amd64.go:16:24的错误<br />
rm -rf /usr/local/go<br />
解压go包</p>
<pre><code>tar -zxf go1.19.1.linux-arm64.tar.gz -C /usr/local
</code></pre>
<h4 id="3配置环境变量vim指令编辑-bashrc">3、配置环境变量，vim指令编辑 .bashrc</h4>
<p>有人喜欢用/etc/profile，我喜欢用这个，有一次编辑后source /etc/profile碰到一个系统级别的错误，你敢信<br />
<a href="https://bugzilla.redhat.com/show_bug.cgi?id=2025709">https://bugzilla.redhat.com/show_bug.cgi?id=2025709</a></p>
<pre><code>vim ~/.bashrc
</code></pre>
<h4 id="4在bashrc文件末尾添加以下配置输入-wq保存">4、在.bashrc文件末尾添加以下配置，输入 :wq保存</h4>
<pre><code>#golang config
export GOROOT=/usr/local/go 
export GOPATH=/data/gopath
export PATH=$PATH:$GOROOT/bin:$GOPATH/bin
</code></pre>
<p>创建go的path目录</p>
<pre><code>mkdir /data/gopath
</code></pre>
<h3 id="5使换将变量配置生效并查看golang的版本">5、使换将变量配置生效，并查看golang的版本</h3>
<pre><code>source ~/.bashrc
go version
</code></pre>
<h3 id="下载和部署">下载和部署</h3>
<h4 id="1-git下载">1 git下载</h4>
<pre><code>git clone https://github.com/ethereum/go-ethereum.git
cd go-ethereum
make all
</code></pre>
<h4 id="2-把geth加到全局">2 把geth加到全局</h4>
<pre><code>export PATH=$PATH:$GOROOT/bin:$GOPATH/bin:{你的目录}/go-ethereum/build/bin
</code></pre>
<h3 id="3-source生效">3 source生效</h3>
<pre><code>source ~/.bashrc
</code></pre>
<h3 id="4-启动">4 启动</h3>
<p>具体参数就参照geth官方文档了<br />
<a href="https://geth.ethereum.org/docs/install-and-build/installing-geth">https://geth.ethereum.org/docs/install-and-build/installing-geth</a></p>

                    ]]>
                </content:encoded>
            </item>
            <item>
                <title><![CDATA[Centos8下挂载超过2T以上硬盘]]></title>
                <link>https://www.qzmer.me/archives/centos8%E4%B8%8B%E6%8C%82%E8%BD%BD%E8%B6%85%E8%BF%872t%E4%BB%A5%E4%B8%8A%E7%A1%AC%E7%9B%98</link>
                <comments>https://www.qzmer.me/archives/centos8%E4%B8%8B%E6%8C%82%E8%BD%BD%E8%B6%85%E8%BF%872t%E4%BB%A5%E4%B8%8A%E7%A1%AC%E7%9B%98#comments</comments>
                <pubDate>Sep 9, 2022 3:11:50 PM</pubDate>
                <dc:creator><![CDATA[qzmer2]]></dc:creator>

                <description>
                    <![CDATA[
                        恩，想用aws的便宜服务，m6g，居然不支持官方centos7镜像。于是只能用centos8。慢慢趟坑吧。超过2t以上的磁盘持载。创建要挂载的目录mkdir/data查看挂载的磁盘fdisk-lDisk/dev/nvme1n1：3TiB，3221225472000字节，6291456000个扇区单元
                    ]]>
                </description>
                <content:encoded>
                    <![CDATA[
                            <p>恩，想用aws的便宜服务，m6g，居然不支持官方centos7镜像。于是只能用centos8。</p>
<p>慢慢趟坑吧。</p>
<p>超过2t以上的磁盘持载。</p>
<h3 id="创建要挂载的目录">创建要挂载的目录</h3>
<pre><code>mkdir /data
</code></pre>
<h3 id="查看挂载的磁盘">查看挂载的磁盘</h3>
<pre><code>fdisk -l

Disk /dev/nvme1n1：3 TiB，3221225472000 字节，6291456000 个扇区
单元：扇区 / 1 * 512 = 512 字节
扇区大小(逻辑/物理)：512 字节 / 512 字节
I/O 大小(最小/最佳)：4096 字节 / 4096 字节
</code></pre>
<p>要挂载的硬盘为 /dev/nvme1n1</p>
<h3 id="对磁盘进行格式化">对磁盘进行格式化</h3>
<pre><code>mkfs -t ext4 /dev/nvme1n1
</code></pre>
<p>该命令会对整个磁盘进行格式化，如果新硬盘没有分区过，可以不执行该操作。</p>
<h3 id="检查磁盘参数">检查磁盘参数</h3>
<pre><code>[root@ip-0-0-0-0 data]# cat /sys/block/nvme1n1/queue/optimal_io_size
4096
[root@ip-0-0-0-0 data]# cat /sys/block/nvme1n1/queue/minimum_io_size
4096
[root@ip-0-0-0-0 data]# cat /sys/block/nvme1n1/alignment_offset
0
[root@ip-0-0-0-0 data]# cat /sys/block/nvme1n1/queue/physical_block_size
512
</code></pre>
<p>如果optimal_io_size不为0，则使用对应值带入下列式子</p>
<p>　　(optimal_io_size + alignment_offset)/physical_block_size</p>
<p>　　计算出即为主分区起始位置的合理值<br />
即为<br />
（4096 + 0 ）/ 512 = 8</p>
<p>如果ptimal_io_size为0，则可以直接使用起始扇区默认值2048即可</p>
<p>　　即 (parted) primary 2048s -1</p>
<h3 id="通过parte命令进行gpt分区">通过parte命令进行GPT分区</h3>
<p>由于dfisk仅支持2T以内硬盘分区，当大于2T时，需要使用parted命令进行GPT格式分区。</p>
<pre><code>[root@ip-0-0-0-0 ~]# parted /dev/nvme1n1
GNU Parted 3.2
使用 /dev/nvme1n1
Welcome to GNU Parted! Type 'help' to view a list of commands.
(parted) mklabel gpt
警告: The existing disk label on /dev/nvme1n1 will be destroyed and all data on this disk will be lost. Do you want to continue?
是/Yes/否/No? yes
(parted) mkpart primary 8s 100%
警告: You requested a partition from 4096B to 3221GB (sectors 8..6291455999).
The closest location we can manage is 17.4kB to 3221GB (sectors 34..6291455966).
Is this still acceptable to you?
是/Yes/否/No? yes
警告: The resulting partition is not properly aligned for best performance: 34s % 2048s != 0s
忽略/Ignore/放弃/Cancel? Cancel
</code></pre>
<p>这里按网上说的计算出来不对应，然后根据提示，我直接使用他的2048s了</p>
<pre><code>(parted) mkpart primary 2048s 100%
(parted) print
Model: NVMe Device (nvme)
Disk /dev/nvme1n1: 3221GB
Sector size (logical/physical): 512B/512B
Partition Table: gpt
Disk Flags:

Number  Start   End     Size    File system  Name     标志
 1      1049kB  3221GB  3221GB               primary

(parted) align-check optimal 1
1 aligned
(parted) quit
信息: You may need to update /etc/fstab.
</code></pre>
<h3 id="再次格式化">再次格式化</h3>
<pre><code>[root@ip-0-0-0-0 ~]# mkfs.ext4 -F /dev/nvme1n1
mke2fs 1.45.6 (20-Mar-2020)
在 gpt 中发现一个 /dev/nvme1n1 分区表
创建含有 786432000 个块（每块 4k）和 196608000 个inode的文件系统
文件系统UUID：841957b5-c5e4-44a6-9eb0-e1c5ba4dcb5c
超级块的备份存储于下列块：
	32768, 98304, 163840, 229376, 294912, 819200, 884736, 1605632, 2654208,
	4096000, 7962624, 11239424, 20480000, 23887872, 71663616, 78675968,
	102400000, 214990848, 512000000, 550731776, 644972544

正在分配组表： 完成
正在写入inode表： 完成
创建日志（262144 个块）完成
写入超级块和文件系统账户统计信息： 已完成
</code></pre>
<h3 id="挂载">挂载</h3>
<pre><code>mount /dev/nvme1n1 /data
</code></pre>
<h3 id="重启自动挂载">重启自动挂载</h3>
<p>写入/etc/fstab，编辑</p>
<pre><code>/dev/nvme1n1   /data   ext4  defaults    1 2
</code></pre>
<h3 id="查看挂载">查看挂载</h3>
<pre><code>df -h
</code></pre>

                    ]]>
                </content:encoded>
            </item>
            <item>
                <title><![CDATA[关于SpringCloud集成zipkin-server时，2.12.9启动报错Error creating bean with name 'armeriaServer']]></title>
                <link>https://www.qzmer.me/archives/%E5%85%B3%E4%BA%8Espringcloud%E9%9B%86%E6%88%90zipkin-server%E6%97%B62129%E5%90%AF%E5%8A%A8%E6%8A%A5%E9%94%99errorcreatingbeanwithnamearmeriaserver</link>
                <comments>https://www.qzmer.me/archives/%E5%85%B3%E4%BA%8Espringcloud%E9%9B%86%E6%88%90zipkin-server%E6%97%B62129%E5%90%AF%E5%8A%A8%E6%8A%A5%E9%94%99errorcreatingbeanwithnamearmeriaserver#comments</comments>
                <pubDate>Jun 23, 2022 6:00:42 PM</pubDate>
                <dc:creator><![CDATA[qzmer2]]></dc:creator>

                        <category><![CDATA[springboot]]></category>
                        <category><![CDATA[springcloud]]></category>
                <description>
                    <![CDATA[
                        百度和google都做了，发现都是抄来抄去。很多引用https://www.cnblogs.com/xc-chejj/p/11344730.html除去直接使用docker的版本，可以正常使用2.12.9，如果自身引用了springboot，其实根据报错位置，调试后很容易发现问题。定位源码发现：所以
                    ]]>
                </description>
                <content:encoded>
                    <![CDATA[
                            <p>百度和google都做了，发现都是抄来抄去。<br />
很多引用<br />
<a href="https://www.cnblogs.com/xc-chejj/p/11344730.html">https://www.cnblogs.com/xc-chejj/p/11344730.html</a></p>
<p>除去直接使用docker的版本，可以正常使用2.12.9，<br />
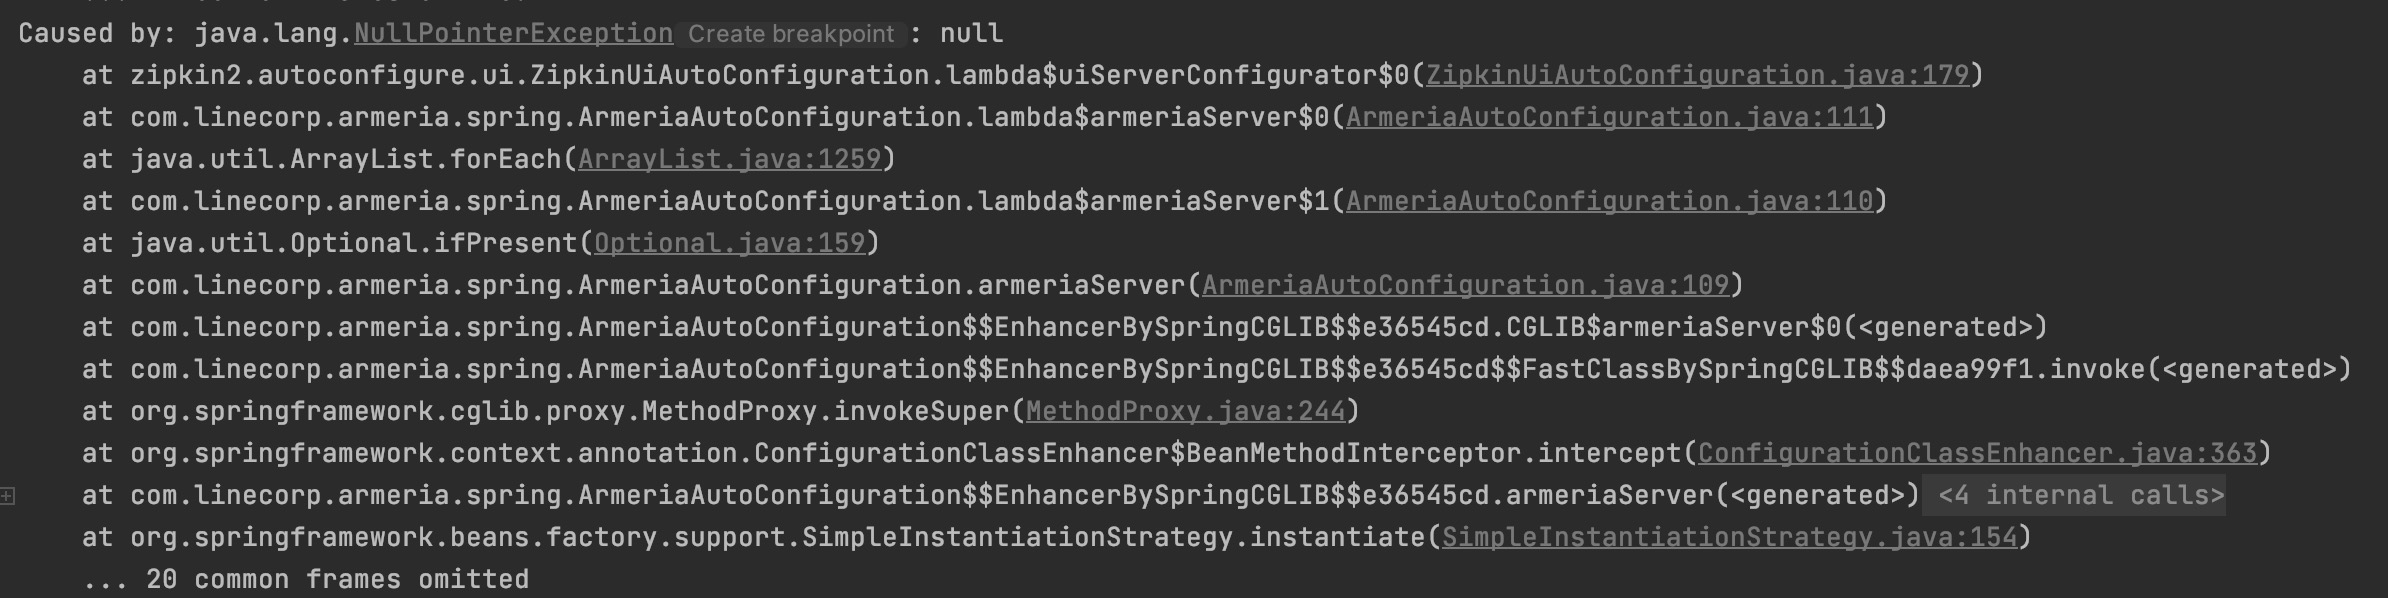
如果自身引用了springboot，其实根据报错位置，调试后很容易发现问题。</p>
<p><img src="https://www.qzmer.me/upload/2022/6/3332-33df337624e34713a71c8de784f3a2cf.jpg" alt="3332.jpg" /></p>
<p>定位源码发现：<br />
<img src="https://www.qzmer.me/upload/2022/6/333334-9693acd3cc3c4b24b66c7a9e9e8f7932.png" alt="333334.png" /></p>
<p>所以只要让compression不为null即可。<br />
不对外的系统gzip做不做压缩问题不大，<br />
只要添加如下配置，即可正常启动了</p>
<pre><code>server.compression.enabled=false
</code></pre>
<p>后面还是放弃折腾，直接用官方打包出来的服务了，太费事了</p>

                    ]]>
                </content:encoded>
            </item>
            <item>
                <title><![CDATA[利用jackson插件 处理json，配置 忽略序列化的字段]]></title>
                <link>https://www.qzmer.me/archives/%E5%88%A9%E7%94%A8jackson%E6%8F%92%E4%BB%B6%E5%A4%84%E7%90%86json%E9%85%8D%E7%BD%AE%E5%BF%BD%E7%95%A5%E5%BA%8F%E5%88%97%E5%8C%96%E7%9A%84%E5%AD%97%E6%AE%B5</link>
                <comments>https://www.qzmer.me/archives/%E5%88%A9%E7%94%A8jackson%E6%8F%92%E4%BB%B6%E5%A4%84%E7%90%86json%E9%85%8D%E7%BD%AE%E5%BF%BD%E7%95%A5%E5%BA%8F%E5%88%97%E5%8C%96%E7%9A%84%E5%AD%97%E6%AE%B5#comments</comments>
                <pubDate>Jun 14, 2022 5:08:14 AM</pubDate>
                <dc:creator><![CDATA[qzmer2]]></dc:creator>

                <description>
                    <![CDATA[
                        说实话虽然springboot官方集成的是jackson，但是好像大家从springmvc时代就一直在用fastjson，对Jackson的不熟悉让大家选择如此吧，我也一直不习惯，不过下面这个功能是真的好用利用jackson插件处理json，配置忽略序列化的字段三种方式：一种：利用注解@JsonFi
                    ]]>
                </description>
                <content:encoded>
                    <![CDATA[
                            <p>说实话虽然springboot官方集成的是jackson，但是好像大家从springmvc时代就一直在用fastjson，对Jackson的不熟悉让大家选择如此吧，我也一直不习惯，不过下面这个功能是真的好用</p>
<p>利用jackson插件 处理json，配置 忽略序列化的字段</p>
<p>三种方式：</p>
<p>一种：利用注解@JsonFilter(&quot;pageFilter&quot;)</p>
<p>1.需要忽略属性的 ben加上注解 @JsonFilter(&quot;pageFilter&quot;)</p>
<ol start="2">
<li>jackson 配置加行</li>
</ol>
<pre><code>FilterProvider filterProvider = new SimpleFilterProvider().addFilter(&quot;pageFilter&quot;,  

                  SimpleBeanPropertyFilter.serializeAllExcept(&quot;number&quot;));  

this.objectMapper.setFilters(filterProvider); 
</code></pre>
<p>说明：注解中的pageFilter字符串和 addFilter中的字符一致，&quot;number&quot;为要忽略的属性</p>
<p>第二种：</p>
<p>第一种需要向ben上加注解，有的时候，不同的地方 json序列化的方式是不同的，比如第一种如果ben 被spring mvc的@ResponseBody 自动序列化就需要 在spring mvc中配置jackson，所以有时会需要第二种方式</p>
<p>1.定义一个接口；例子</p>
<pre><code>                     @JsonFilter(&quot;pageFilter&quot;)  

                     public interface PageFilterMixIn{  

                       } 
</code></pre>
<ol start="2">
<li>jackson 配置加行</li>
</ol>
<pre><code>FilterProvider filterProvider = new SimpleFilterProvider().addFilter(&quot;pageFilter&quot;,  

                  SimpleBeanPropertyFilter.serializeAllExcept(&quot;number&quot;));  

this.objectMapper.setFilters(filterProvider); 


objectMapper.addMixInAnnotations(Page.class,PageFilterMixIn.class);  
</code></pre>
<p>这样，page 对象的number 属性就不会被json序列化了</p>
<p>第三种，属性上 加@JsonIgnore</p>
<p>原文链接：<a href="https://blog.csdn.net/feiteyizu123/article/details/84726136">https://blog.csdn.net/feiteyizu123/article/details/84726136</a></p>

                    ]]>
                </content:encoded>
            </item>
            <item>
                <title><![CDATA[修改mysql8默认数据文件存储路径]]></title>
                <link>https://www.qzmer.me/archives/%E4%BF%AE%E6%94%B9mysql8%E9%BB%98%E8%AE%A4%E6%95%B0%E6%8D%AE%E6%96%87%E4%BB%B6%E5%AD%98%E5%82%A8%E8%B7%AF%E5%BE%84</link>
                <comments>https://www.qzmer.me/archives/%E4%BF%AE%E6%94%B9mysql8%E9%BB%98%E8%AE%A4%E6%95%B0%E6%8D%AE%E6%96%87%E4%BB%B6%E5%AD%98%E5%82%A8%E8%B7%AF%E5%BE%84#comments</comments>
                <pubDate>Jun 8, 2022 6:09:33 PM</pubDate>
                <dc:creator><![CDATA[qzmer2]]></dc:creator>

                <description>
                    <![CDATA[
                        1.安装MySQL82.查看MySQL8的数据存储路径showglobalvariableslike&quot;%datadir%&quot;;结果:2.停止MySQL服务systemctlstopmysqld3.移动数据存储路径到指定位置mv/var/lib/mysql/NFSfile4.建立软链
                    ]]>
                </description>
                <content:encoded>
                    <![CDATA[
                            <h3 id="1-安装-mysql8">1. 安装 MySQL8</h3>
<h3 id="2-查看-mysql8-的数据存储路径">2. 查看 MySQL8 的数据存储路径</h3>
<pre><code>
show global variables like &quot;%datadir%&quot;;
</code></pre>
<p>结果:</p>
<h3 id="2-停止-mysql-服务">2. 停止 MySQL 服务</h3>
<pre><code>
systemctl stop mysqld
</code></pre>
<h3 id="3-移动数据存储路径到指定位置">3. 移动数据存储路径到指定位置</h3>
<pre><code>mv /var/lib/mysql /NFSfile
</code></pre>
<h3 id="4-建立软链接">4. 建立软链接</h3>
<pre><code>ln -s /NFSfile/mysql /var/lib/mysql
</code></pre>
<h3 id="5-查看软连接状态">5. 查看软连接状态</h3>
<pre><code>ls -la /var/lib/mysql
</code></pre>
<h3 id="6-修改配置文件">6. 修改配置文件</h3>
<pre><code>vim /etc/my.cnf
</code></pre>
<h3 id="7-授权路径">7. 授权路径</h3>
<pre><code>chown mysql:mysql -R /mnt/mysql_wp/mysql
</code></pre>
<h3 id="8-重启-mysql">8. 重启 MySQL</h3>
<pre><code>systemctl start mysqld
</code></pre>
<h3 id="9-查看存储路径">9. 查看存储路径</h3>
<pre><code>show global variables like &quot;%datadir%&quot;;
</code></pre>

                    ]]>
                </content:encoded>
            </item>
            <item>
                <title><![CDATA[ubantu 安装redis 6]]></title>
                <link>https://www.qzmer.me/archives/ubantu%E5%AE%89%E8%A3%85redis6</link>
                <comments>https://www.qzmer.me/archives/ubantu%E5%AE%89%E8%A3%85redis6#comments</comments>
                <pubDate>Apr 20, 2022 5:15:11 PM</pubDate>
                <dc:creator><![CDATA[qzmer2]]></dc:creator>

                <description>
                    <![CDATA[
                        主要参考https://citizix.com/how-to-install-and-configure-redis-6-on-ubuntu-20-04/删除默认3.0版本的服务与配置apt-getremoveredis-serverapt-getremove--purgeredis-serverr
                    ]]>
                </description>
                <content:encoded>
                    <![CDATA[
                            <p>主要参考<br />
<a href="https://citizix.com/how-to-install-and-configure-redis-6-on-ubuntu-20-04/">https://citizix.com/how-to-install-and-configure-redis-6-on-ubuntu-20-04/</a></p>
<p>删除默认3.0版本的服务与配置</p>
<pre><code>apt-get remove redis-server   
apt-get remove --purge redis-server  
 
rm -rf /etc/redis
</code></pre>
<p>根据官网添加识别最新</p>
<pre><code>curl https://packages.redis.io/gpg | sudo apt-key add -

echo &quot;deb https://packages.redis.io/deb $(lsb_release -cs) main&quot; | sudo tee /etc/apt/sources.list.d/redis.list
</code></pre>
<p>安装</p>
<pre><code>sudo apt-get update
sudo apt-get install redis
// 查看版本
apt-cache policy info redis
// 重启
sudo systemctl restart redis-server

</code></pre>
<p>其他可以参考centos配置修改配置文件信息</p>

                    ]]>
                </content:encoded>
            </item>
            <item>
                <title><![CDATA[my.cnf]]></title>
                <link>https://www.qzmer.me/archives/mycnf</link>
                <comments>https://www.qzmer.me/archives/mycnf#comments</comments>
                <pubDate>May 14, 2021 8:45:08 PM</pubDate>
                <dc:creator><![CDATA[qzmer2]]></dc:creator>

                <description>
                    <![CDATA[
                        [mysql]host=localhostuser=rootpassword=[mysqld]##Removeleading#andsettotheamountofRAMforthemostimportantdata#cacheinMySQL.Startat70%oftotalRAMfordedic
                    ]]>
                </description>
                <content:encoded>
                    <![CDATA[
                            <pre><code>[mysql]
host=localhost
user=root
password=

[mysqld]
#
# Remove leading # and set to the amount of RAM for the most important data
# cache in MySQL. Start at 70% of total RAM for dedicated server, else 10%.
# innodb_buffer_pool_size = 128M
#
# Remove the leading &quot;# &quot; to disable binary logging
# Binary logging captures changes between backups and is enabled by
# default. It's default setting is log_bin=binlog
# disable_log_bin
#
# Remove leading # to set options mainly useful for reporting servers.
# The server defaults are faster for transactions and fast SELECTs.
# Adjust sizes as needed, experiment to find the optimal values.
# join_buffer_size = 128M
# sort_buffer_size = 2M
# read_rnd_buffer_size = 2M
#
# Remove leading # to revert to previous value for default_authentication_plugin,
# this will increase compatibility with older clients. For background, see:
# https://dev.mysql.com/doc/refman/8.0/en/server-system-variables.html#sysvar_default_authentication_plugin
# default-authentication-plugin=mysql_native_password

datadir=/var/lib/mysql
socket=/var/lib/mysql/mysql.sock

log-error=/var/log/mysqld.log
pid-file=/var/run/mysqld/mysqld.pid


default-authentication-plugin=mysql_native_password
lower_case_table_names=1

max_connections=5000
wait_timeout = 600
interactive_timeout = 600
back_log=128
max_user_connections= 600
max_connect_errors = 2000
character-set-server = utf8mb4

sql_mode=STRICT_TRANS_TABLES,ERROR_FOR_DIVISION_BY_ZERO,NO_ENGINE_SUBSTITUTION
</code></pre>

                    ]]>
                </content:encoded>
            </item>
            <item>
                <title><![CDATA[apple mbp  M1 下的svn报错引发的一系列问题解决]]></title>
                <link>https://www.qzmer.me/archives/applem1svn</link>
                <comments>https://www.qzmer.me/archives/applem1svn#comments</comments>
                <pubDate>Feb 20, 2021 5:02:49 PM</pubDate>
                <dc:creator><![CDATA[qzmer2]]></dc:creator>

                        <category><![CDATA[tools]]></category>
                <description>
                    <![CDATA[
                        M1使用还是很爽的，特别是定制16g内存后，基本上无以前的卡顿问题了。但是兼容确实是一个长久的问题不用折腾的办法想直接homebrew使用svn，最好能恢复原来的文件，把/usr/local/目录下的homebrew迁移到/opt目录下，这种一劳永逸。不得不折腾的办法但是我的丢了，问了朋友也没有，于
                    ]]>
                </description>
                <content:encoded>
                    <![CDATA[
                            <p>M1使用还是很爽的，特别是定制16g内存后，基本上无以前的卡顿问题了。</p>
<p>但是兼容确实是一个长久的问题</p>
<h2 id="不用折腾的办法">不用折腾的办法</h2>
<p>想直接homebrew使用svn，最好能恢复原来的文件，把/usr/local/目录下的homebrew迁移到/opt目录下，这种一劳永逸。</p>
<h2 id="不得不折腾的办法">不得不折腾的办法</h2>
<p>但是我的丢了，问了朋友也没有，于是开始了折腾记。<br />
直接brew install svn后</p>
<p>在IDEA使用svn，疯狂</p>
<pre><code>Some errors occurred while accessing svn working copy database
</code></pre>
<p>而且还不能自动保存账号密码</p>
<p>于是找到了<br />
<a href="https://www.v2ex.com/t/729784">https://www.v2ex.com/t/729784</a></p>
<p>后来用着不爽，还是折腾一下</p>
<p>我自己安装的brew 里已经有了apr 和apr-util</p>
<pre><code>wget http://mirrors.ustc.edu.cn/gentoo/distfiles/subversion-1.14.1.tar.bz2
tar xf subversion-1.14.1.tar.bz2
cd subversion-1.14.1

./configure --prefix=/opt/homebrew/Cellar/subversion/1.14.1 --with-apr=/opt/homebrew/opt/apr --with-apr-util=/opt/homebrew/opt/apr-util --with-utf8proc=/opt/homebrew/opt/utf8proc
</code></pre>
<p>于是有了第一个错误</p>
<pre><code>configure: error: Subversion requires LZ4 &gt;= r129, or use --with-lz4=internal
</code></pre>
<p>修改加上 with-lz4</p>
<pre><code>./configure --prefix=/opt/homebrew/Cellar/subversion/1.14.1 --with-apr=/opt/homebrew/opt/apr --with-apr-util=/opt/homebrew/opt/apr-util --with-utf8proc=/opt/homebrew/opt/utf8proc --with-lz4=internal
</code></pre>
<p>于是继续出错</p>
<pre><code>subversion/libsvn_delta/text_delta.c:29:10: fatal error: 'apr_md5.h' file not found
</code></pre>
<p>于是自己下载编译</p>
<pre><code>wget http://archive.apache.org/dist/apr/apr-util-1.6.1.tar.bz2 
tar xf apr-util-1.6.1.tar.bz2
cd apr-util-1.6.1
./configure --prefix=/usr/local/opt/apr-util-svn --with-apr=/opt/homebrew/opt/apr
make &amp;&amp; make install
</code></pre>
<p>然后继续之前的，把apr-util目录换掉</p>
<pre><code>./configure --prefix=/opt/homebrew/Cellar/subversion/1.14.1 --with-apr=/opt/homebrew/opt/apr --with-apr-util=/usr/local/opt/apr-util-svn --with-utf8proc=/opt/homebrew/opt/utf8proc --with-lz4=internal
</code></pre>
<p>编译成功了，一阵惊喜，使用命令看一看可以用了</p>
<pre><code>svn --version
</code></pre>
<p>按楼上说的安装之后，发现还是报错<br />
于是翻到了这个<br />
<a href="https://blog.csdn.net/hell_oword/article/details/113182301">https://blog.csdn.net/hell_oword/article/details/113182301</a><br />
查日志的方法找到确实是sqllite的报错</p>
<blockquote>
<p>配置后的错误处理 Some errors occurred while accessing svn working copy database<br />
我遇到的问题发生在本地代码更新时，idea 疯狂报错，本地代码的更新会被回退掉<br />
按照以下思路排查：先看下idea的报错日志，如图依次点击<br />
在这里插入图片描述<br />
如果报错和 sqlite 有关，是由于 idea的jar包错误导致，sqlite-jdbc-3.21.0.1 不知持当前系统，需要更换lib目录下的jar包 Contents/lib/sqlite-jdbc-3.21.0.1 &gt; Contents/lib/sqlite-jdbc-3.32.3.3.jar<br />
太慢了，直接用maven下载<br />
下载地址<br />
<a href="https://repo1.maven.org/maven2/org/xerial/sqlite-jdbc/3.32.3.3/sqlite-jdbc-3.32.3.3.jar">https://repo1.maven.org/maven2/org/xerial/sqlite-jdbc/3.32.3.3/sqlite-jdbc-3.32.3.3.jar</a><br />
官方已作出说明<br />
<a href="https://youtrack.jetbrains.com/issue/IDEA-257549">https://youtrack.jetbrains.com/issue/IDEA-257549</a></p>
</blockquote>
<p>maven的太慢<br />
换成aliyun的<a href="https://maven.aliyun.com/mvn/search">https://maven.aliyun.com/mvn/search</a><br />
直接搜索下载<br />
替换jar包后，果然没问题了</p>
<h4 id="发现新问题">发现新问题</h4>
<p>自己安装的svn不支持http和https协议的svn地址</p>
<pre><code>svn: E170000: Unrecognized URL scheme for https://ip:port/xxx/trunk/
</code></pre>
<p>于是又一顿折腾<br />
了解到1.8之后，使用serf支持<br />
于是，继续折腾<br />
基本上出现的问题<br />
<a href="https://blog.csdn.net/yangyouchang/article/details/104675366">https://blog.csdn.net/yangyouchang/article/details/104675366</a><br />
大致上如上</p>
<pre><code>scons: Reading SConscript files ...
  File &quot;/home/shenyong/serf-1.3.9/SConstruct&quot;, line 186
    print 'Warning: Used unknown variables:', ', '.join(unknown.keys())
                                           ^
SyntaxError: invalid syntax
</code></pre>
<p>和</p>
<pre><code>
</code></pre>
<p>于是就安装serf，<br />
我用的是scons安装</p>
<pre><code>brew install scons
</code></pre>
<p>然后安装手动编译安装serf吧</p>
<pre><code>wget https://ftp.tsukuba.wide.ad.jp/software/apache/serf/serf-1.3.9.tar.bz2
tar xf serf-1.3.9.tar.bz2
cd serf-1.3.9
scons PREFIX=/usr/local/opt/serf APR=/opt/homebrew/opt/apr APU=/usr/local/opt/apr-util-svn OPENSSL=/opt/homebrew/opt/openssl
</code></pre>
<p>此处说明：一定要指定apr,apu,openssl的路径，因为scons安装不会自动找brew库，另外PREFIX指定到/usr/local需要文件夹权限，我放到了/usr/local/opt下<br />
如果没有openssl就brew install openssl咯</p>
<p>上面用python3编译肯定会报错，要编译通过牵涉到对SConstruct文件的修改</p>
<pre><code>#一个是 169行，需要增加.decode('utf-8')，修改如下
env.File('serf.h').get_contents().decode('utf-8'),

#一个是大概185行附近的，把if和打印注释掉
#if unknown:
#  print 'Warning: Used unknown variables:', ', '.join(unknown.keys())
</code></pre>
<p>修改完善后</p>
<pre><code>scons PREFIX=/usr/local/opt/serf APR=/opt/homebrew/opt/apr APU=/usr/local/opt/apr-util-svn OPENSSL=/opt/homebrew/opt/openssl
scons install
</code></pre>
<p>此处就安装好了serf了</p>
<p>这样就可以愉快的安装svn了</p>
<pre><code>./configure --prefix=/opt/homebrew/Cellar/subversion/1.14.1 --with-apr=/opt/homebrew/opt/apr --with-apr-util=/usr/local/opt/apr-util-svn --with-utf8proc=/opt/homebrew/opt/utf8proc --with-lz4=internal --with-serf=/usr/local/opt/serf
make clean 
make &amp;&amp; make install

</code></pre>
<p>暂时写到这里，如果还有问题，再补充</p>

                    ]]>
                </content:encoded>
            </item>
            <item>
                <title><![CDATA[centos7.6+下自动安装nginx，mysql，redis等及初始化脚本]]></title>
                <link>https://www.qzmer.me/archives/centos76%E4%B8%8B%E8%87%AA%E5%8A%A8%E5%AE%89%E8%A3%85nginxmysqlredis%E7%AD%89%E5%8F%8A%E5%88%9D%E5%A7%8B%E5%8C%96%E8%84%9A%E6%9C%AC</link>
                <comments>https://www.qzmer.me/archives/centos76%E4%B8%8B%E8%87%AA%E5%8A%A8%E5%AE%89%E8%A3%85nginxmysqlredis%E7%AD%89%E5%8F%8A%E5%88%9D%E5%A7%8B%E5%8C%96%E8%84%9A%E6%9C%AC#comments</comments>
                <pubDate>Feb 5, 2021 11:10:01 AM</pubDate>
                <dc:creator><![CDATA[qzmer2]]></dc:creator>

                <description>
                    <![CDATA[
                        装系统太多，这种工具还是有必要的，自己视情况修改和调整吧里面我牵涉到的密码，请自行修改为自己的设置#!/bin/bashif[[&quot;$(whoami)&quot;!=&quot;root&quot;]];thenecho&quot;请切换root用户.&quot;&gt;&amp;2exit
                    ]]>
                </description>
                <content:encoded>
                    <![CDATA[
                            <p>装系统太多，这种工具还是有必要的，自己视情况修改和调整吧<br />
里面我牵涉到的密码，请自行修改为自己的设置</p>
<pre><code>#!/bin/bash

if [[ &quot;$(whoami)&quot; != &quot;root&quot; ]]; then
    echo &quot;请切换root用户 .&quot; &gt;&amp;2
    exit 1
fi
echo &quot;适用CENTOS 7.6+&quot;
echo -e &quot;\033[31m 修改selinux 关闭防火墙 系统参数等，有需要可自己微调 5秒后执行 \033[0m&quot;
#sleep 1
#echo &quot;1秒&quot;
#sleep 1
#echo &quot;2秒&quot;
#sleep 1
#echo &quot;3秒&quot;
#sleep 1
#echo &quot;4秒&quot;
#sleep 1
echo &quot;开始执行中请勿操作，结束后会有提示&quot;

#下载yumepel源 ,获取阿里源
yum_config(){
    yum install wget epel-release -y
    cd /etc/yum.repos.d/ &amp;&amp; mkdir bak &amp;&amp; mv -f *.repo bak/
    wget -O /etc/yum.repos.d/CentOS-Base.repo http://mirrors.aliyun.com/repo/Centos-7.repo
    wget -O /etc/yum.repos.d/epel.repo http://mirrors.aliyun.com/repo/epel-7.repo
    yum clean all &amp;&amp; yum makecache
    #选装，如需自行调整 yum -y install iotop iftop net-tools lrzsz gcc gcc-c++ make cmake libxml2-devel openssl-devel curl curl-devel unzip sudo ntp libaio-devel wget vim ncurses-devel autoconf automake zlib-devel  python-devel bash-completion
}

#防火墙关闭
iptables_config(){
    systemctl stop firewalld.service
    systemctl disable firewalld.service
    systemctl stop iptables
    systemctl disable iptables
}

#修改默认端口
ssh2_config(){
    sed -i &quot;s/Port 22$/Port 2222/g&quot; /etc/ssh/sshd_config
    systemctl restart sshd.service
}

#selinux关闭 时区 时间服务器chrony(需要自己删除注释)
system_config(){
    sed -i &quot;s/SELINUX=enforcing/SELINUX=disabled/g&quot; /etc/selinux/config
    #timedatectl set-local-rtc 1 &amp;&amp; timedatectl set-timezone Asia/Shanghai
    #yum -y install chrony &amp;&amp; systemctl start chronyd.service &amp;&amp; systemctl enable chronyd.service
}

#打开文件限制
ulimit_config(){
    echo &quot;ulimit -SHn 102400&quot; &gt;&gt; /etc/rc.local
    cat &gt;&gt; /etc/security/limits.conf &lt;&lt; EOF
*           soft   nofile       102400
*           hard   nofile       102400
*           soft   nproc        102400
*           hard   nproc        102400
EOF
}

#mac下打开报
lang_config(){
     cat &gt;&gt;  /etc/locale.conf &lt;&lt; EOF
LC_ALL=en_US.utf8
LC_CTYPE=en_US.utf8
EOF
}

#安装一些常用yum包
yum_pkg_config(){
    yum -y install lshw pciutils gdisk install bash-completion zip unzip bzip2 tree tmpwatch pinfo man-pages install nano vim-enhanced tmux screen install net-tools psmisclsof sysstat install yum-plugin-security yum-utils createrepo install get wget curl eliks lynx lftp mailx mutt reync  install libaio make cmake gcc-c++ gcc zib zlib-devel open openssl-devel pcre pcre-devel
}

#时区同步配置，主要用于非国内服务器
ntp_config(){
    yum -y install ntp
    systemctl enable ntpd
    service ntpd restart
    timedatectl set-timezone Asia/Shanghai
    #上海，北京时间
    #ln -sf /usr/share/zoneinfo/Asia/Shanghai /etc/localtime
    #悉尼
    #ln -sf /usr/share/zoneinfo/Australia/Sydney  /etc/localtime
}

#安装和自动配置redis
redis_config(){
    yum install -y epel-release yum-utils
    yum install -y http://rpms.remirepo.net/enterprise/remi-release-7.rpm
    yum-config-manager --enable remi
    yum install -y redis
    chkconfig redis on
    sed -i 's/bind 127.0.0.1/bind 0.0.0.0/g' /etc/redis.conf
    sed -i 's/# requirepass foobared/requirepass xxxxx/g' /etc/redis.conf
    systemctl start redis
}

#jdk
jdk_config(){
    yum install -y java-1.8.0-openjdk-devel.x86_64
}

main(){
    yum_config &amp;&gt;/dev/mull
    iptables_config  &amp;&gt;/dev/mull
    system_config  &amp;&gt;/dev/mull
    ulimit_config  &amp;&gt;/dev/mull
    #lang_config  &amp;&gt;/dev/mull
    yum_pkg_config &amp;&gt;/dev/mull
    #ntp_config &amp;&gt;/dev/mull
    redis_config &amp;&gt;/dev/mull
    jdk_config &amp;&gt;/dev/mull
    echo &quot;初始化完成！&quot;
}
main
</code></pre>
<p>mysql8自动安装</p>
<pre><code>#!/bin/bash
yum -y install expect
rpm -Uvh https://dev.mysql.com/get/mysql80-community-release-el7-1.noarch.rpm
yum --enablerepo=mysql80-community install -y mysql-community-server --nogpgcheck
cat &gt;&gt;  /etc/my.cnf &lt;&lt; EOF
lower_case_table_names=1
default-authentication-plugin=mysql_native_password
max_connections=5000
wait_timeout = 600
interactive_timeout = 600
back_log=128
max_user_connections= 600
max_connect_errors = 2000
character-set-server = utf8mb4
sql_mode=STRICT_TRANS_TABLES,ERROR_FOR_DIVISION_BY_ZERO,NO_ENGINE_SUBSTITUTION
EOF
mysqld --initialize --lower-case-table-names=1 --user=mysql --console
service mysqld start
pwd=$(grep 'temporary password' /var/log/mysqld.log |grep -P '[^\s]+$' -o)
expect &lt;&lt; EOF
set timeout 1
spawn mysql -u root -p
expect &quot;*password:&quot;
send &quot;$pwd\r&quot;
expect 'mysql&gt;*'
send &quot;ALTER USER 'root'@'localhost' IDENTIFIED BY 'xxx';\r&quot;
expect 'mysql&gt;*'
send &quot;flush privileges;\r&quot;
expect 'mysql&gt;*'
send &quot;create USER 'root'@'%' IDENTIFIED BY 'xxx' PASSWORD EXPIRE NEVER;\r&quot;
expect 'mysql&gt;*'
send &quot;GRANT ALL PRIVILEGES ON *.* TO 'root'@'%' WITH GRANT OPTION;\r&quot;
expect 'mysql&gt;*'
send &quot;flush privileges;\r&quot;
expect 'mysql&gt;*'
send &quot;quit\r&quot;;
interact
EOF
</code></pre>
<p>nginx自动安装</p>
<pre><code>!/bin/bash
rpm -Uvh http://nginx.org/packages/centos/7/noarch/RPMS/nginx-release-centos-7-0.el7.ngx.noarch.rpm
yum install -y nginx
systemctl enable nginx.service
cp /etc/nginx/nginx.conf /etc/nginx/nginx.conf.bk
&gt; /etc/nginx/nginx.conf
cat /etc/nginx/nginx.conf &lt;&lt; EOF
user  nginx;
worker_processes  auto;

error_log  /var/log/nginx/error.log warn;
pid        /var/run/nginx.pid;

worker_rlimit_nofile 65536;
events {
    worker_connections  1024;
}

http {
    include       /etc/nginx/mime.types;
    default_type  application/octet-stream;

    log_format  main  '$remote_addr - $remote_user [$time_local] &quot;$request&quot; '
                      '$status $body_bytes_sent &quot;$http_referer&quot; '
                      '&quot;$http_user_agent&quot; &quot;$http_x_forwarded_for&quot;';

    access_log  /var/log/nginx/access.log  main;

    sendfile            on;
    tcp_nopush          on;
    tcp_nodelay         on;
    server_tokens       off;
    keepalive_timeout   65;
    types_hash_max_size 2048;
    client_max_body_size 10m;

    gzip on;
    gzip_min_length 1k;
    gzip_buffers 4 32k;
    gzip_http_version 1.1;
    gzip_comp_level 2;
    gzip_types text/plain application/x-javascript application/javascript text/css application/xml text/javascript application/x-httpd-php image/jpeg image/gif image/png application/vnd.ms-fontobject font/ttf application/json font/opentype font/x-woff image/svg+xml;
    gzip_vary on;
    gzip_disable &quot;MSIE [1-6]\.&quot;;

    proxy_headers_hash_max_size 51200;
    proxy_headers_hash_bucket_size 6400;

    include conf.d/*.conf;
}
EOF

service nginx start
</code></pre>

                    ]]>
                </content:encoded>
            </item>
            <item>
                <title><![CDATA[Springboot 多环境部署]]></title>
                <link>https://www.qzmer.me/archives/springboot%E5%A4%9A%E7%8E%AF%E5%A2%83%E9%83%A8%E7%BD%B2</link>
                <comments>https://www.qzmer.me/archives/springboot%E5%A4%9A%E7%8E%AF%E5%A2%83%E9%83%A8%E7%BD%B2#comments</comments>
                <pubDate>Jan 11, 2021 8:13:09 PM</pubDate>
                <dc:creator><![CDATA[qzmer2]]></dc:creator>

                        <category><![CDATA[web]]></category>
                        <category><![CDATA[springboot]]></category>
                <description>
                    <![CDATA[
                        激活profile  spring为我们提供了大量的激活profile的方法，可以通过代码来激活，也可以通过系统环境变量、JVM参数、servlet上下文参数来定义spring.profiles.active参数激活profile，这里我们通过定义JVM参数实现。1、ENV方式：系统环境配置代码中可
                    ]]>
                </description>
                <content:encoded>
                    <![CDATA[
                            <p>激活 profile</p>
<p>  spring 为我们提供了大量的激活 profile 的方法，可以通过代码来激活，也可以通过系统环境变量、JVM参数、servlet上下文参数来定义 spring.profiles.active 参数激活 profile，这里我们通过定义 JVM 参数实现。</p>
<h3 id="1env方式">1、ENV方式：</h3>
<p>系统环境配置<br />
代码中可使用</p>
<pre><code>ConfigurableEnvironment.setActiveProfiles(&quot;test&quot;)
</code></pre>
<p>系统配置可通过添加环境变量的方式，共一个个war包启动不同配置。</p>
<h4 id="war-包">war 包</h4>
<p>生产可以在~/.bashrc或类似文件上添加以下配</p>
<pre><code> export SPRING_PROFILES_ACTIVE=prod
</code></pre>
<h4 id="jar包">jar包</h4>
<pre><code>nohup java -jar xxx.jar --spring.profiles.active=test &gt; /dev/null 2&gt;&amp;1 &amp;
</code></pre>
<h3 id="2jvm参数方式">2、JVM参数方式:</h3>
<p>  tomcat 中windows 环境修改 catalina.bat 添加JAVA_OPS。通过设置active选择不同配置文件</p>
<pre><code>set &quot;JAVA_OPTS=%JAVA_OPTS% -Dspring.profiles.active=test&quot;
</code></pre>
<p>linux 环境修改 catalina.sh<br />
搜索JAVA_OPTS，在其后添加一行</p>
<pre><code>JAVA_OPTS=&quot;$JAVA_OPTS -Dspring.profiles.active=test&quot;
</code></pre>
<p>或<br />
  eclipse或IDEA中启动tomcat。项目右键 run as –&gt; run configuration–&gt;Arguments–&gt; VM arguments中添加。local配置文件不必上传Git追踪管理</p>
<pre><code>-Dspring.profiles.active=&quot;local&quot;
</code></pre>
<h3 id="3webxml方式">3、web.xml方式：</h3>
<pre><code>&lt;init-param&gt;
 &lt;param-name&gt;spring.profiles.active&lt;/param-name&gt;
 &lt;param-value&gt;production&lt;/param-value&gt;
&lt;/init-param&gt;
</code></pre>
<h3 id="4标注方式junit单元测试非常实用">4、标注方式（junit单元测试非常实用）：</h3>
<pre><code>@ActiveProfiles({&quot;unittest&quot;,&quot;productprofile&quot;})
</code></pre>

                    ]]>
                </content:encoded>
            </item>
            <item>
                <title><![CDATA[服务器之间的免密登录]]></title>
                <link>https://www.qzmer.me/archives/%E6%9C%8D%E5%8A%A1%E5%99%A8%E4%B9%8B%E9%97%B4%E7%9A%84%E5%85%8D%E5%AF%86%E7%99%BB%E5%BD%95</link>
                <comments>https://www.qzmer.me/archives/%E6%9C%8D%E5%8A%A1%E5%99%A8%E4%B9%8B%E9%97%B4%E7%9A%84%E5%85%8D%E5%AF%86%E7%99%BB%E5%BD%95#comments</comments>
                <pubDate>Dec 26, 2020 5:42:17 PM</pubDate>
                <dc:creator><![CDATA[qzmer2]]></dc:creator>

                        <category><![CDATA[linux]]></category>
                <description>
                    <![CDATA[
                        例如我们有两台主机：A:192.168.0.1B:192.168.0.2当我们需要用主机A登录远程主机B时，我们在主机A上输入：一、#ssh-keygen-trsa会产生如下的信息：所有操作直接回车，无须输入Generatingpublic/privatersakeypair.Enterfilein
                    ]]>
                </description>
                <content:encoded>
                    <![CDATA[
                            <p>例如我们有两台主机：</p>
<p>A:192.168.0.1   B:192.168.0.2</p>
<p>当我们需要用主机A登录远程主机B时，我们在主机A上输入：</p>
<p>一、生成公钥</p>
<pre><code>ssh-keygen -t rsa  
</code></pre>
<p>会产生如下的信息：所有操作直接回车，无须输入<br />
Generating public/private rsa key pair.<br />
Enter file in which to save the key (/root/.ssh/id_rsa):      -&gt;输入key文件的名称<br />
Enter passphrase (empty for no passphrase):                       -&gt;输入使用key时的密码，注意这里不是远处服务器的密码，<br />
只是你使用sshkey时需要输入的密码，<br />
建议不输入(如果要输入这个密码还不如直接输入<br />
远处主机的密码：）)<br />
Enter same passphrase again:<br />
Your identification has been saved in /root/.ssh/id_rsa.<br />
Your public key has been saved in /root/.ssh/id_rsa.pub.<br />
The key fingerprint is:<br />
11:ae:00:bd:92:bc:70:f8:4b:cb:47:06:7f:e2:73:21 root@xxxxxx</p>
<p>二、把公钥文件传输到B服务器</p>
<pre><code>scp id_rsa.pub 192.168.0.2:/root/.ssh/xxx.pub
</code></pre>
<p>这些建议改名，因为防止跟0.2服务器自身生成的同名</p>
<p>三、直接用账号密码登录服务器</p>
<pre><code>ssh 192.168.0.2    -&gt;登录远程主机B
root@192.168.0.2's password: -&gt;输入密码 
</code></pre>
<p>四、把公钥内容追加到authorized_keys文件内</p>
<pre><code>cd /root/.ssh    -&gt;进入到key目录
cat id_rsa.pub &gt;&gt; authorized_keys
</code></pre>
<p>如此第二步有修改文件名，这里也要用修改后的文件名</p>
<p>五、修改相应用户的文件夹和文件权限。此步很重要，并且一定要按顺序。<br />
当前在.ssh目录下</p>
<pre><code>chmod 700 ../.ssh
chmod 600  authorized_keys
</code></pre>
<p>六、#退出远程B服务器</p>
<pre><code>exit
</code></pre>
<p>七、#重新启动ssh服务</p>
<pre><code>service sshd restart
</code></pre>
<p>八、#ssh 192.168.0.2  -&gt;远程登录到B测试下吧：）</p>

                    ]]>
                </content:encoded>
            </item>
            <item>
                <title><![CDATA[谷歌邮箱stmp发邮件配置]]></title>
                <link>https://www.qzmer.me/archives/%E8%B0%B7%E6%AD%8C%E9%82%AE%E7%AE%B1stmp%E5%8F%91%E9%82%AE%E4%BB%B6%E9%85%8D%E7%BD%AE</link>
                <comments>https://www.qzmer.me/archives/%E8%B0%B7%E6%AD%8C%E9%82%AE%E7%AE%B1stmp%E5%8F%91%E9%82%AE%E4%BB%B6%E9%85%8D%E7%BD%AE#comments</comments>
                <pubDate>Dec 11, 2020 1:19:58 PM</pubDate>
                <dc:creator><![CDATA[qzmer2]]></dc:creator>

                <description>
                    <![CDATA[
                        谷歌邮箱海外使用非常友好，而且国际化也做得不错，最近有个需求是需要配置发邮件的。使用springboot的email自动化配置，加上配置文件即可完成配置，但是如果要正常发送邮件，还需要关闭安全验证。谷歌邮箱有个默认安全功能，如果异地登录则拦截发送，我们需要开启允许异地登录个人邮箱安全设置https:
                    ]]>
                </description>
                <content:encoded>
                    <![CDATA[
                            <p>谷歌邮箱海外使用非常友好，而且国际化也做得不错，最近有个需求是需要配置发邮件的。使用springboot的email自动化配置，加上配置文件即可完成配置，但是如果要正常发送邮件，还需要关闭安全验证。</p>
<p>谷歌邮箱有个默认安全功能，如果异地登录则拦截发送，我们需要开启允许异地登录</p>
<p>个人邮箱安全设置<br />
<a href="https://myaccount.google.com/lesssecureapps">https://myaccount.google.com/lesssecureapps</a><br />
然后打开允许的开关</p>
<p><img src="https://www.52mfei.cn/content/uploadfile/202002/f7cd1581822814.png" alt="" /></p>

                    ]]>
                </content:encoded>
            </item>
            <item>
                <title><![CDATA[关于使用过公钥登录ecs后，再更换成root登录后连接的问题]]></title>
                <link>https://www.qzmer.me/archives/%E5%85%B3%E4%BA%8E%E4%BD%BF%E7%94%A8%E8%BF%87%E5%85%AC%E9%92%A5%E7%99%BB%E5%BD%95ecs%E5%90%8E%E5%86%8D%E6%9B%B4%E6%8D%A2%E6%88%90root%E7%99%BB%E5%BD%95%E5%90%8E%E8%BF%9E%E6%8E%A5%E7%9A%84%E9%97%AE%E9%A2%98</link>
                <comments>https://www.qzmer.me/archives/%E5%85%B3%E4%BA%8E%E4%BD%BF%E7%94%A8%E8%BF%87%E5%85%AC%E9%92%A5%E7%99%BB%E5%BD%95ecs%E5%90%8E%E5%86%8D%E6%9B%B4%E6%8D%A2%E6%88%90root%E7%99%BB%E5%BD%95%E5%90%8E%E8%BF%9E%E6%8E%A5%E7%9A%84%E9%97%AE%E9%A2%98#comments</comments>
                <pubDate>Dec 3, 2020 3:17:09 PM</pubDate>
                <dc:creator><![CDATA[qzmer2]]></dc:creator>

                        <category><![CDATA[linux]]></category>
                <description>
                    <![CDATA[
                        登录一直报以下错误spawnssh-oStrictHostKeyChecking=noroot@8.210.253.233@@@@@@@@@@@@@@@@@@@@@@@@@@@@@@@@@@@@@@@@@@@@@@@@@@@@@@@@@@@@WARNING:REMOTEHOSTIDENTIFICAT
                    ]]>
                </description>
                <content:encoded>
                    <![CDATA[
                            <p>登录一直报以下错误</p>
<pre><code>spawn ssh -o StrictHostKeyChecking=no root@8.210.253.233
@@@@@@@@@@@@@@@@@@@@@@@@@@@@@@@@@@@@@@@@@@@@@@@@@@@@@@@@@@@
@    WARNING: REMOTE HOST IDENTIFICATION HAS CHANGED!     @
@@@@@@@@@@@@@@@@@@@@@@@@@@@@@@@@@@@@@@@@@@@@@@@@@@@@@@@@@@@
IT IS POSSIBLE THAT SOMEONE IS DOING SOMETHING NASTY!
Someone could be eavesdropping on you right now (man-in-the-middle attack)!
It is also possible that a host key has just been changed.
The fingerprint for the ECDSA key sent by the remote host is
SHA256:LELLcDG55ebYMwIVRaqL7T+GZrBgHLBMKvnA2deCR0M.
Please contact your system administrator.
Add correct host key in /Users/xxx/.ssh/known_hosts to get rid of this message.
Offending ECDSA key in /Users/xxx/.ssh/known_hosts:63
Password authentication is disabled to avoid man-in-the-middle attacks.
Keyboard-interactive authentication is disabled to avoid man-in-the-middle attacks.
root@8.210.253.233: Permission denied (publickey,gssapi-keyex,gssapi-with-mic,password).
</code></pre>
<p>一直在处理服务器的know_hosts文件，后来发现需要替换本机的。<br />
使用以下命令即可</p>
<pre><code>ssh-keygen -f ~/.ssh/known_hosts -R 服务器ip
</code></pre>
<p>理解为电脑其实对host有缓存，删除之后重新连接即可。</p>

                    ]]>
                </content:encoded>
            </item>
            <item>
                <title><![CDATA[Springboot jar包和war包多环境启动方案]]></title>
                <link>https://www.qzmer.me/archives/springbootjar%E5%8C%85%E5%92%8Cwar%E5%8C%85%E5%A4%9A%E7%8E%AF%E5%A2%83%E5%90%AF%E5%8A%A8%E6%96%B9%E6%A1%88</link>
                <comments>https://www.qzmer.me/archives/springbootjar%E5%8C%85%E5%92%8Cwar%E5%8C%85%E5%A4%9A%E7%8E%AF%E5%A2%83%E5%90%AF%E5%8A%A8%E6%96%B9%E6%A1%88#comments</comments>
                <pubDate>Nov 30, 2020 5:10:10 PM</pubDate>
                <dc:creator><![CDATA[qzmer2]]></dc:creator>

                        <category><![CDATA[springboot]]></category>
                <description>
                    <![CDATA[
                        每次根据测试或生产环境重新打jar或war包的方案肯定不科学的。于是想弄一个自动根据环境启动相应环境的方案。找到以下方法jar包的方式通过命令行指定java-Dspring.profiles.active=prod-jarxxx.jarwar包的方式1、修改环境配置vim~/.bash_profil
                    ]]>
                </description>
                <content:encoded>
                    <![CDATA[
                            <p>每次根据测试或生产环境重新打jar或war包的方案肯定不科学的。<br />
于是想弄一个自动根据环境启动相应环境的方案。</p>
<p>找到以下方法</p>
<h4 id="jar包的方式">jar包的方式</h4>
<p>通过命令行指定</p>
<pre><code>java -Dspring.profiles.active=prod -jar xxx.jar
</code></pre>
<h4 id="war包的方式">war包的方式</h4>
<h5 id="1修改环境配置">1、修改环境配置</h5>
<pre><code>vim ~/.bash_profile
export SPRING_PROFILES_ACTIVE=dev
</code></pre>
<p>修改完记得source一下，当然因为是修改服务器的环境配置，就不限于.bash_profile，修改.bashrc等等都是可以的</p>
<h5 id="2修改catalina启动文件">2、修改catalina启动文件</h5>
<p>修改catalina.sh添加：</p>
<pre><code>export SPRING_PROFILES_ACTIVE=dev
</code></pre>
<p>或者</p>
<pre><code>-Dspring.profiles.active=dev
</code></pre>
<p>当然以上方法使用的原理同1，不过如果只是修改tomcat里的配置，则只是影响单独的tomcat而已，可自行视情况决定</p>

                    ]]>
                </content:encoded>
            </item>
            <item>
                <title><![CDATA[Centos7.5下Minio分布式部署 ]]></title>
                <link>https://www.qzmer.me/archives/centos75%E4%B8%8Bminio%E5%88%86%E5%B8%83%E5%BC%8F%E9%83%A8%E7%BD%B2</link>
                <comments>https://www.qzmer.me/archives/centos75%E4%B8%8Bminio%E5%88%86%E5%B8%83%E5%BC%8F%E9%83%A8%E7%BD%B2#comments</comments>
                <pubDate>Sep 18, 2020 7:05:12 PM</pubDate>
                <dc:creator><![CDATA[qzmer2]]></dc:creator>

                        <category><![CDATA[linux]]></category>
                        <category><![CDATA[web]]></category>
                <description>
                    <![CDATA[
                        机器资源本集群由2台服务器构成（官方推荐集群最小4台服务器），每个服务器上挂载两个磁盘目录，最小数据挂载点为4个1、准备机器服务器：192.168.0.101/minio/data1/minio/data2服务器：192.168.0.102/minio/data1/minio/data22、创建相关
                    ]]>
                </description>
                <content:encoded>
                    <![CDATA[
                            <p>机器资源<br />
本集群由2台服务器构成（官方推荐集群最小4台服务器），每个服务器上挂载两个磁盘目录，最小数据挂载点为4个</p>
<h3 id="1准备机器">1、准备机器</h3>
<p>服务器：192.168.0.101<br />
/minio/data1<br />
/minio/data2</p>
<p>服务器：192.168.0.102<br />
/minio/data1<br />
/minio/data2</p>
<h3 id="2创建相关目录所有节点配置文件相同">2、创建相关目录（所有节点配置文件相同）</h3>
<p>数据存储目录</p>
<pre><code>mkdir -p /minio/{data1,data2}
</code></pre>
<p>启动脚本目录</p>
<pre><code>mkdir -p /opt/minio
</code></pre>
<p>集群配置文件目录</p>
<pre><code>mkdir -p /etc/minio
</code></pre>
<h3 id="3编写集群启动脚本所有节点配置文件相同">3、编写集群启动脚本（所有节点配置文件相同）</h3>
<pre><code>vim /opt/minio/run.sh
</code></pre>
<p>以下内容保存成文件</p>
<pre><code>#!/bin/bash
export MINIO_ACCESS_KEY=Minio
export MINIO_SECRET_KEY=Test123456
 
/opt/minio/minio server --config-dir /etc/minio \
http://192.168.0.101/minio/data1 http://192.168.0.101/minio/data2 \
http://192.168.0.102/minio/data1 http://192.168.0.102/minio/data2 &gt; /opt/minio/minio.log
</code></pre>
<p>其中，“MINIO_ACCESS_KEY”为用户名，“MINIO_SECRET_KEY”为密码，密码不能设置过于简单（至少8位），不然minio会启动失败，“–config-dir”指定集群配置文件目录</p>
<h3 id="4编写服务脚本所有节点配置文件相同">4、编写服务脚本（所有节点配置文件相同）</h3>
<pre><code>vim /usr/lib/systemd/system/minio.service
</code></pre>
<p>以下内容保存成文件</p>
<pre><code>[Unit]
Description=Minio service
Documentation=https://docs.minio.io/
 
[Service]
WorkingDirectory=/opt/minio/
ExecStart=/opt/minio/run.sh
 
Restart=on-failure
RestartSec=5
 
[Install]
WantedBy=multi-user.target
</code></pre>
<pre><code>chmod +x /usr/lib/systemd/system/minio.service
</code></pre>
<p>其中，“WorkingDirectory”为启动脚本目录，“ExecStart”为指定集群启动脚本</p>
<h3 id="5启动测试">5、启动测试</h3>
<p>将minio主文件上传到/opt/minio目录下并赋予权限</p>
<pre><code>chmod +x minio
</code></pre>
<p>赋予启动文件权限</p>
<pre><code>chmod +x /opt/minio/run.sh
</code></pre>
<p>启动</p>
<pre><code>systemctl daemon-reload
systemctl start minio
systemctl enable minio
</code></pre>
<p>浏览器输入集群任意节点地址+9000端口，即可访问minio，用户名密码为前面设置的“MINIO_ACCESS_KEY”和“MINIO_SECRET_KEY”，可创建“bucket”并上传文件测试</p>
<h3 id="6修改已启动过的服务的账号密码">6、修改已启动过的服务的账号密码</h3>
<p>如果你已经使用一个账号密码启动过一次了，则需要修改run.sh<br />
账号密码修改后为如下</p>
<pre><code>export MINIO_ACCESS_KEY=newminio
export MINIO_SECRET_KEY=newminio123
export MINIO_ACCESS_KEY_OLD=Minio
export MINIO_SECRET_KEY_OLD=Test123456
</code></pre>
<p>并且，只能使用一次，已经修改启动后，下次再重启，则需要删除_OLD结尾的内容。当前版本如此</p>
<pre><code>./minio -v
minio version RELEASE.2020-09-10T22-02-45Z
</code></pre>
<p>参考：<br />
<a href="https://github.com/minio/minio/issues/9413">https://github.com/minio/minio/issues/9413</a><br />
<a href="https://github.com/minio/minio/tree/master/docs/config#rotating-encryption-with-new-credentials">https://github.com/minio/minio/tree/master/docs/config#rotating-encryption-with-new-credentials</a></p>

                    ]]>
                </content:encoded>
            </item>
</rss>